Table of Contents
ToggleIntroduction
Are you tired of staring at dingy, discolored grout lines that make your beautiful bathroom tiles look dull and unappealing? You’re not alone in this frustrating bathroom battle. Grout, the porous material that fills the gaps between your tiles, naturally absorbs dirt, soap scum, and moisture over time, transforming from pristine white to an unsightly shade of gray, brown, or even pink.
The good news? You don’t need aggressive chemical cleaners that leave harsh fumes and potentially harmful residues to restore your grout’s former glory. In fact, some of the most effective grout cleaning solutions are hiding right in your kitchen pantry.
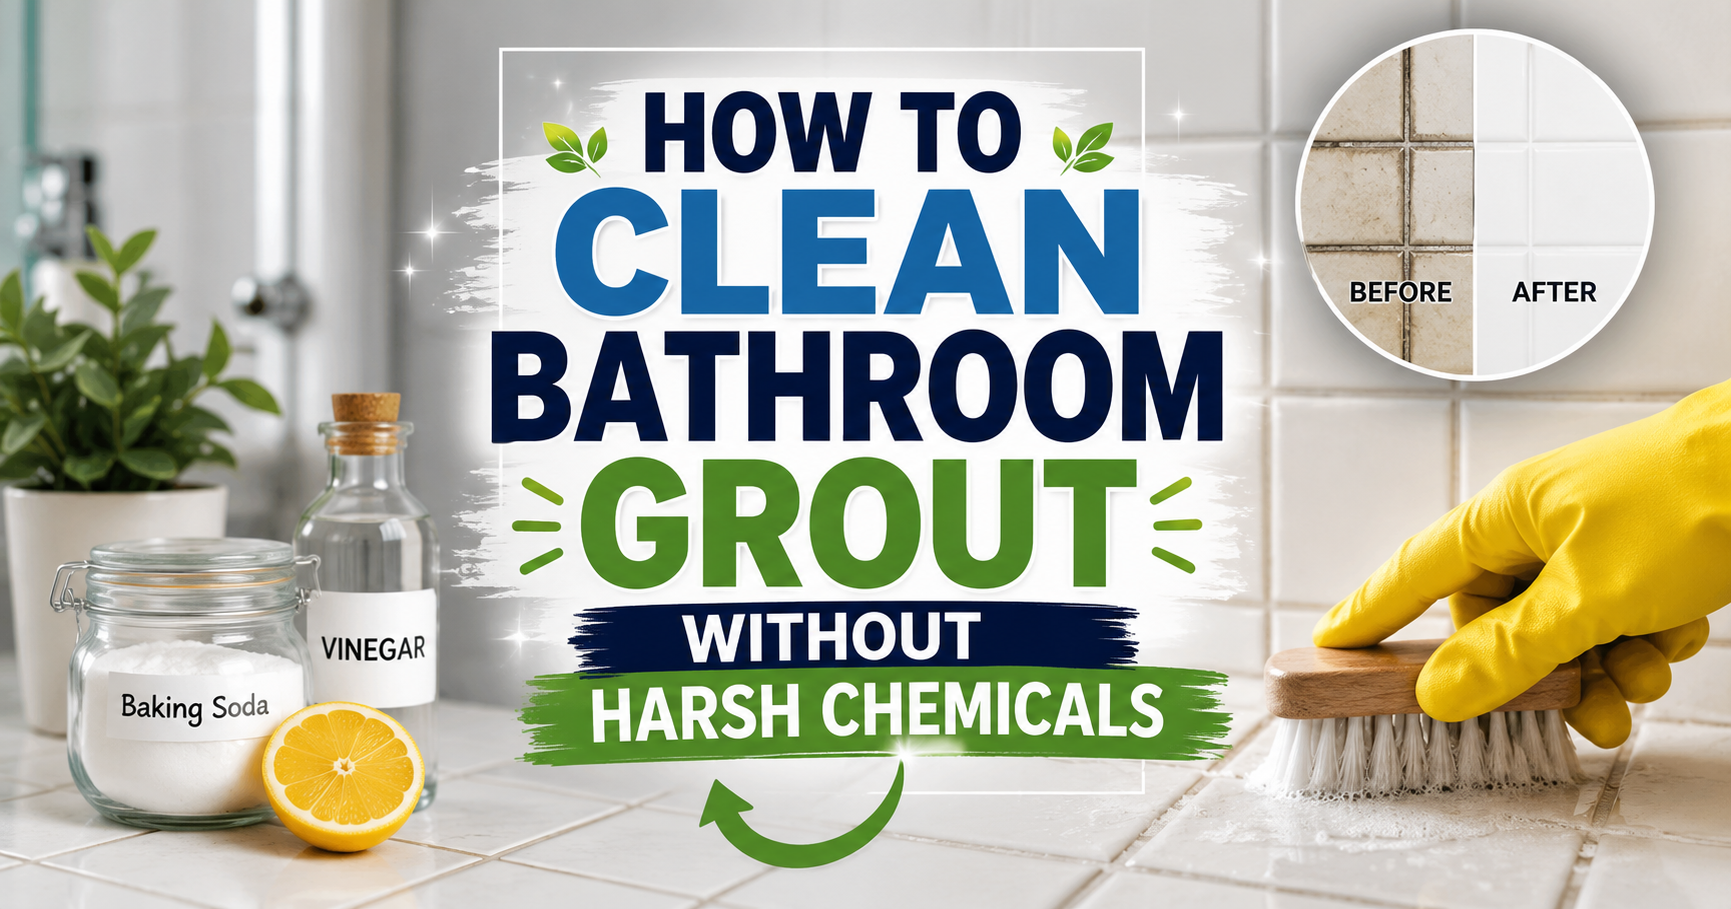
This comprehensive guide will walk you through everything you need to know about how to clean bathroom grout without harsh chemicals, using natural, cost-effective, and eco-friendly methods that actually work. Whether you’re dealing with mild discoloration or stubborn, deeply embedded stains, we’ve got you covered.
In our modern world, where we’re increasingly aware of the chemicals we introduce into our homes, understanding how to maintain our spaces naturally has never been more important. Chemical cleaners, while effective, can release volatile organic compounds (VOCs) that affect indoor air quality, cause respiratory issues, and pose risks to children and pets.
This guide combines traditional wisdom with modern cleaning science to provide you with solutions that are safe, effective, and budget-friendly. You’ll discover why everyday ingredients like baking soda and vinegar are unsung heroes in the cleaning world, and how they can transform your bathroom without the need for expensive commercial cleaners or harsh chemicals.
By the time you finish reading this article, you’ll have a complete understanding of natural grout cleaning techniques that deliver professional-quality results. Let’s embark on this cleaning journey together and give your bathroom the fresh, clean look it deserves! 🧹✨
Understanding Bathroom Grout: The Basics
Before diving into cleaning methods, it’s essential to understand what grout is and why it presents such a persistent cleaning challenge. Knowledge is power, and in this case, knowing your enemy helps you defeat it more effectively.
What Is Grout and Why Does It Get Dirty?
Grout is essentially a cement-based or epoxy-based material used to fill the spaces between tiles during installation. It serves several critical functions:
- Structural Support: It holds tiles firmly in place
- Water Protection: It helps prevent water from seeping beneath tiles
- Aesthetic Appeal: It provides a uniform, finished appearance
However, grout’s very nature makes it vulnerable to staining and discoloration. Being porous, it acts like a sponge, absorbing everything it comes into contact with:
- Water and moisture
- Soap residue and shampoo
- Body oils and skin cells
- Dust and dirt particles
- Mold and mildew spores
- Mineral deposits from hard water
Over time, these contaminants accumulate within the grout’s pores, leading to the dark, dingy appearance that plagues many bathrooms. The discoloration isn’t just superficial – it penetrates deep into the grout’s structure, making cleaning a challenge.
Expert Tip: “Understanding your grout type is crucial for effective cleaning. Cement-based grout is porous and requires sealing, while epoxy grout is non-porous and resists staining much better.” – Professional Tile Installer, 15+ years experience
Different Types of Grout Explained
Choosing and maintaining grout properly starts with knowing what type you have. The two main categories are:
Sanded Grout
- Contains fine sand particles
- Used for wider joints (typically 1/8 inch and above)
- Provides better strength and prevents shrinkage
- More difficult to clean due to its texture
Unsanded Grout
- Smooth, without sand particles
- Used for narrow joints (1/8 inch and smaller)
- Less likely to scratch polished tile surfaces
- Less durable than sanded grout
Epoxy Grout
- Resin-based, not cement-based
- Non-porous and stain-resistant
- More expensive
- Does not require sealing
- Much easier to clean and maintain
Advice Tip: For bathrooms with sanded grout, sealing is absolutely essential. Apply a penetrating sealer every 1-2 years to create a protective barrier against stains and make future cleaning easier.
Why Choose Natural Grout Cleaning Methods
You might wonder why you should bother with natural solutions when commercial grout cleaners promise instant results. Here’s why making the switch is one of the best decisions for your health, your home, and the environment.
Health Benefits for Your Family 🏡👨👩👧👦
Commercial cleaning products often contain harsh chemicals that pose real health risks:
- Respiratory Issues: Inhaling chemical fumes can trigger asthma, allergies, and respiratory irritation
- Skin Irritation: Many cleaners cause contact dermatitis, rashes, and chemical burns
- Toxic Exposure: Toxic substances like bleach, ammonia, and glycol ethers are linked to various health problems
- Children and Pets at Risk: Small children and animals are especially vulnerable to chemical residues left on surfaces
Statistics: The Environmental Working Group (EWG) reports that many common household cleaners contain ingredients that haven’t been adequately tested for safety. Over 2,000 cleaning products contain chemicals that are classified as hazardous by the EPA.
Environmental Impact 🌍
The environmental cost of chemical cleaners is staggering:
- Water Pollution: Harsh chemicals wash down drains and eventually enter waterways
- Aquatic Toxicity: Many ingredients are toxic to fish and marine life
- Packaging Waste: Plastic bottles contribute to the plastic pollution crisis
- VOC Emissions: Volatile organic compounds harm air quality both indoors and outdoors
Expert Quote: “What we clean our homes with doesn’t just disappear. Everything we pour down our drains eventually ends up in the environment. Choosing natural cleaners is one of the simplest ways to reduce your environmental footprint.” – Green Living Advocate
Long-Term Tile Protection 🛡️
Chemical cleaners may provide quick results but often cause long-term damage:
- Grout Breakdown: Acidic or abrasive chemical cleaners can eat away at grout, causing deterioration
- Tile Damage: Some chemical cleaners are corrosive enough to damage tile surfaces
- Discoloration: Repeated chemical exposure can cause permanent color changes
- Sealer Destruction: Harsh chemicals can break down protective sealers, leaving grout more vulnerable
Expert Advice: “I’ve seen bathrooms where chemical cleaners actually destroyed the grout over time. The homeowners kept using stronger chemicals thinking they weren’t working hard enough, when in reality the chemicals were dissolving the grout itself.” – Bathroom Renovation Specialist
Essential Natural Cleaning Ingredients
Before we dive into specific methods, let’s explore the natural powerhouse ingredients that form the foundation of chemical-free grout cleaning. Understanding what each ingredient does helps you choose the right approach for your situation.
The Power of Baking Soda 🧂
Baking soda (sodium bicarbonate) is perhaps the most versatile natural cleaning agent available:
Why It Works:
- Mildly abrasive (perfect for scrubbing without scratching)
- Alkaline (helps break down acidic stains and oils)
- Absorbs odors naturally
- Safe and non-toxic
- Rinses cleanly with water
Best For: General grout cleaning, mild stains, and as a component of cleaning pastes
Application Tips:
- Use as a paste with water for mild cleaning
- Combine with vinegar for extra cleaning power
- Add hydrogen peroxide for whitening boost
- Great for everyday maintenance
Storage Tip: Baking soda absorbs moisture and odors, so keep it in an airtight container.
White Vinegar: The Versatile Cleaner 🧪
White distilled vinegar is a powerhouse natural cleaner with remarkable versatility:
Why It Works:
- Acetic acid effectively dissolves mineral deposits, soap scum, and alkaline stains
- Natural disinfectant properties
- Environmentally friendly
- Inexpensive and widely available
- Non-toxic and safe
Best For: Hard water stains, soap residue, mildew, and dissolving alkaline buildup
Application Tips:
- Use undiluted for tough stains
- Mix with water for general cleaning
- Combine with baking soda for enhanced cleaning power
- Avoid prolonged contact with natural stone tiles
⚠️ Warning: Never mix vinegar with hydrogen peroxide. This combination creates peracetic acid, which is toxic and corrosive.
Hydrogen Peroxide: The Stain Fighter 💧
Hydrogen peroxide is a gentle but powerful oxidizer perfect for whitening and disinfecting:
Why It Works:
- Releases oxygen molecules that break down stains
- Natural bleaching action
- Effectively kills bacteria, mold, and mildew
- Safe for most surfaces when properly diluted
- Breaks down into water and oxygen
Best For: Stubborn stains, mildew, mold, and whitening discolored grout
Application Tips:
- Use 3% solution (standard household strength)
- Mix with baking soda for a powerful whitening paste
- Works best when left to sit before scrubbing
- Excellent for restoring white grout
Important: Test on a small area first to ensure no color change occurs.
Lemon Juice: Nature’s Bleach 🍋
Lemon juice combines acidity with a pleasant fresh fragrance:
Why It Works:
- Natural citric acid dissolves mineral deposits
- Mild bleaching action brightens surfaces
- Natural antibacterial properties
- Delightful fresh scent
- Non-toxic and biodegradable
Best For: Mineral stains, brightening, and adding pleasant fragrance
Application Tips:
- Combine with baking soda for a powerful paste
- Use with vinegar for enhanced acidity
- Add salt for gentle abrasive action
- Great for removing hard water stains
Advice Tip: Fresh lemon juice works better than bottled lemon juice, which often contains preservatives and reduced potency.
Castile Soap: Gentle Yet Effective 🧼
Pure Castile soap is a vegetable-based soap that cleans without harsh chemicals:
Why It Works:
- Plant-based ingredients, non-toxic
- Good for general cleaning and degreasing
- Biodegradable and eco-friendly
- Creates mild suds for easy application
- Safe for all surfaces
Best For: General cleaning, soap scum, and everyday maintenance
Application Tips:
- Use with baking soda for a thick cleaning paste
- Great in spray bottle solutions with water
- Safe for daily use
- Excellent for sensitive skin
Step-by-Step Natural Grout Cleaning Methods
Now it’s time to get into the practical methods. Each approach targets different types of grout stains and conditions. We’ll cover the most effective methods so you can choose what works best for your specific situation.
Method 1: Baking Soda and Vinegar Paste 🧂🧪
This classic combination creates a cleaning powerhouse through simple chemistry:
What You’ll Need:
- 1 cup baking soda
- 1/4 cup white vinegar
- Small bowl for mixing
- Grout brush
- Water for rinsing
Step-by-Step Process:
- Mix the baking soda and vinegar together in a bowl
- Caution: The mixture will fizz and bubble – that’s good!
- Aim for a toothpaste-like consistency
- Add more vinegar or baking soda to get the right texture
- Apply the paste generously to grout lines
- Use a small brush, old toothbrush, or your finger to apply
- Ensure thorough coverage, focusing on dirty areas
- Let it sit for 10-15 minutes
- Scrub the grout using your grout brush
- Apply firm pressure in circular motions
- Work in sections to avoid the paste drying
- Notice how the paste turns dirty as it lifts stains
- Rinse thoroughly with clean water
- Use a sponge or cloth to remove the paste
- Rinse the cloth frequently
- Ensure all residue is removed
- Dry the area with a clean towel or let it air dry
Why It Works: The vinegar’s acidity dissolves mineral deposits while baking soda’s abrasion physically removes dirt. The reaction creates carbon dioxide bubbles that help lift stains away from grout.
Expert Tip: “For particularly stubborn grout, let the baking soda and vinegar paste sit for up to 30 minutes. Cover with a damp cloth to prevent drying and keep it active longer.” – Natural Cleaning Specialist
Method 2: Hydrogen Peroxide and Baking Soda ✨🧂
This is the most powerful whitening method in the natural arsenal:
What You’ll Need:
- 1/2 cup baking soda
- 1/4 cup 3% hydrogen peroxide
- Mixing container
- Grout brush
- Clean cloths or sponges
Step-by-Step Process:
- Combine ingredients to form a thick paste
- The consistency should be spreadable but not too liquid
- Mix thoroughly until smooth
- Apply directly to grout lines
- Spread evenly with a brush or small spatula
- Ensure full coverage on all dirty areas
- Let it sit for 10-15 minutes
- Scrub thoroughly with grout brush
- Use circular motions with moderate pressure
- Work in small sections
- Wipe away paste after scrubbing
- Rinse with a damp sponge
- Remove all residual paste
- Change water frequently to avoid redepositing dirt
- Repeat on stubborn spots if necessary
- Some heavily stained grout may need a second treatment
Why It Works: Hydrogen peroxide releases oxygen that breaks down stains, while baking soda provides mild abrasion. Together, they create a powerful whitening effect.
Advice Tip: This method is perfect for bathroom floors, shower walls, and kitchen backsplashes. The hydrogen peroxide also disinfects, killing mold and mildew spores.
Method 3: Lemon Juice and Cream of Tartar 🍋
This culinary combination yields excellent results for specific stains:
What You’ll Need:
- Fresh lemon juice (about 1/4 cup)
- Cream of tartar (enough to form paste)
- Mixing bowl
- Application brush
Step-by-Step Process:
- Combine lemon juice and cream of tartar
- Mix until you have a thick, spreadable paste
- Let the mixture sit for a few minutes to activate
- Apply generously to stained grout
- Use a small brush or toothbrush
- Focus on visible discolorations
- Let it sit for 10-15 minutes
- Scrub in a circular motion
- The cream of tartar provides mild abrasion
- Lemon juice works on mineral buildup
- Rinse thoroughly with clean water
- Remove all paste residue
- Dry the area
Why It Works: Citric acid from lemon juice dissolves mineral deposits while cream of tartar (potassium bitartrate) provides gentle abrasive action.
Expert Quote: “I’ve been using lemon juice and cream of tartar on my bathroom grout for years. It’s gentle enough for routine cleaning but powerful enough to handle most stains. The fresh lemon scent is an added bonus.” – Home Cleaner, 20+ years
Method 4: Oxygen Bleach Solution 🌊
For deep cleaning without harsh chemicals, oxygen bleach is your answer:
What You’ll Need:
- Oxygen bleach powder (sodium percarbonate)
- Warm water
- Spray bottle
- Grout brush
Step-by-Step Process:
- Mix 2 tablespoons of oxygen bleach with warm water
- Follow package directions for proper ratios
- Use warm water to activate the oxygen release
- Spray generously on grout lines
- Allow to sit for 15-20 minutes
- The solution will bubble as it works
- Scrub thoroughly after sitting
- Apply brush pressure in circular motions
- Notice the dirt lifting
- Rinse thoroughly with clean water
- Remove all residue
- Dry the area
Why It Works: Oxygen bleach releases oxygen molecules that oxidize stains, breaking them down into simple compounds that rinse away easily.
Advice Tip: Oxygen bleach is much gentler than chlorine bleach and safe for most surfaces. The activated oxygen also kills mold and mildew effectively.
The Best DIY Grout Cleaner Recipes
Here are the top DIY natural grout cleaner recipes for various situations:
Recipe 1: Everyday Grout Cleaner (Spray)
- 2 cups warm water
- 2 tablespoons baking soda
- 2 tablespoons white vinegar
- 5 drops essential oil (optional)
- Mix in spray bottle, shake well before use
Recipe 2: Whitening Grout Paste
- 1/2 cup baking soda
- 3 tablespoons hydrogen peroxide
- Mix to paste consistency
- Apply and let sit for 10-15 minutes
Recipe 3: Heavy-Duty Grout Cleaner
- 1/2 cup baking soda
- 1/4 cup white vinegar
- 1 tablespoon Castile soap
- Mix, apply thickly to grout
Recipe 4: Weekly Maintenance Spray
- 2 cups water
- 1/2 cup white vinegar
- 1 tablespoon liquid Castile soap
- 10 drops tea tree essential oil
- Spray and wipe daily
Tools You’ll Need for Successful Grout Cleaning
Having the right tools makes all the difference:
Grout Brush Options
- Small grout brush: Nylon bristles designed for grout lines
- Old toothbrush: Perfect for smaller areas and tight spaces
- Rotary brush: Battery-powered for reduced effort
- Grout brush with extendable handle: For floors
Steam Cleaners 💨
Steam cleaning is exceptionally effective for grout:
- Why It Works: High-temperature steam penetrates pores and dissolves dirt
- What to Buy: Handheld steam cleaner or steam mop with grout attachment
- Cost: $100-300 for quality unit
- Eco-Friendly: Uses only water; no chemicals needed
Application Tools
- Small paintbrush: For careful application of paste
- Spray bottle: For solutions and pre-treatment
- Grout sponge: Large pores absorb and release water well
- Microfiber cloths: For drying and final wipe-down
Pre-Cleaning Preparation Steps
Proper preparation ensures optimal results:
- Clear the Area
- Remove all items from the floor and surfaces
- Move bathroom mats, hampers, and other items
- Create a clear workspace
- Dry the Grout
- Grout should be dry before applying cleaners
- Moisture can dilute the cleaning solution
- Use a fan or towel to dry thoroughly
- Vacuum or Sweep
- Remove all loose dirt, dust, and debris
- A clean surface allows better chemical action
- Pay attention to corners where dirt accumulates
- Test on Small Area
- Always test a small, inconspicuous area first
- Check for color-fastness or adverse reactions
- Ensure the method works on your particular grout
- Wear Protective Gear
- Though using natural cleaners, wear gloves
- Eyewear protection for splashing
- Consider a face mask if sensitive to dust
Deep Grout Cleaning Process – Detailed Guide
🎯 Expert Technique: This complete 7-step process is proven to deliver professional results.
Step 1: Surface Preparation
- Remove all surface debris and dust
- Inspect for damage or loose grout
- Address any visible issues before cleaning
Step 2: Apply Cleaner
- Choose your natural cleaner (paste or spray)
- Apply thoroughly with appropriate tool
- Cover all grout lines completely
- Let it sit for recommended time
Step 3: Agitate and Scrub
- Use the right brush for the job
- Apply firm pressure with circular motions
- Work in small sections
- Use a small toothbrush for corners
Step 4: Let It Sit
- Allow the cleaning mixture to work
- Don’t let it dry completely (re-wet if needed)
- For tough stains, let it sit longer
Step 5: Rinse
- Use clean water and a sponge
- Remove all cleaning residue
- Rinse thoroughly to prevent residue
Step 6: Repeat or Reapply
- For stubborn stains, repeat the process
- Some stains require multiple applications
- Consider a different method for deep stains
Step 7: Seal (Optional)
- Apply grout sealer after cleaning and drying
- Sealing helps prevent future stains
- Creates a protective barrier
Case Study 1: “Our bathroom grout hadn’t been properly cleaned in 8 years. The grout was brown and moldy. Using the baking soda and hydrogen peroxide method three times, we restored it to an almost-white color. People couldn’t believe the transformation!” – Sarah M., Mother of 3
Common Mistakes to Avoid When Cleaning Grout
Mistake 1: Using Too Much Water
- Problem: Water pushes dirt deeper into grout
- Solution: Use minimal water and rinse properly
Mistake 2: Scrubbing Too Hard
- Problem: Can damage grout or tiles
- Solution: Use the right amount of pressure
Mistake 3: Not Rinsing Thoroughly
- Problem: Leaves residue that attracts more dirt
- Solution: Rinse well with clean water
Mistake 4: Letting Cleaner Dry Completely
- Problem: Hardened cleaner is difficult to remove
- Solution: Keep surface damp while cleaning
Mistake 5: Mixing Vinegar and Hydrogen Peroxide
- Problem: Creates toxic peracetic acid
- Solution: Never combine these two ingredients
Mistake 6: Using Acid on Natural Stone
- Problem: Vinegar damages natural stone
- Solution: Use pH-neutral cleaners for stone
Maintaining Clean Grout After Deep Cleaning
Daily Maintenance Tips 🧹
- Squeegee: Use after every shower to remove standing water
- Wipe Down: Dry surfaces with a towel after use
- Ventilation: Keep bathroom well-ventilated with a fan
- Mat Use: Use a bath mat to reduce water on floors
- Immediate Cleanup: Address spills and drips immediately
Weekly and Monthly Routines
Weekly Tasks:
- Lightly spray with natural cleaner and wipe
- Check for early signs of discoloration
- Address small spots before they become problems
Monthly Tasks:
- Deep clean with baking soda paste
- Inspect sealant condition
- Reapply sealer if needed
- Clean and polish tiles for shine
Professional Tips for Stubborn Grout Stains
💡 The Steam Secret: Professional cleaners often use steam because it’s chemical-free and highly effective.
🧽 The Multiple Application Approach: Don’t expect one application to solve years of dirt. Multiple applications may be necessary.
🌀 The Pre-Treatment Principle: Pre-treating with a solution and allowing it to soak before scrubbing yields better results.
🌡️ Temperature Matters: Warm cleaning solutions often work better than cold ones.
⏰ Patience Is Essential: Natural cleaners typically take longer than chemical ones. Be patient for the best results.
The Science Behind Natural Grout Cleaning
The Chemistry of Grout:
- Grout is cement-based and porous
- Pores trap dirt, oils, minerals, and bacteria
- Discoloration comes from trapped contaminants
How Natural Cleaners Work:
- Acids (vinegar, lemon): Dissolve minerals and soap scum
- Alkalis (baking soda): Break down oils and grease
- Oxidizers (hydrogen peroxide): Break down pigments
- Abrasives (baking soda): Physically remove stains
- Surfactants (Castile soap): Help lift dirt away
The Bacteria Factor:
- Natural cleaners also kill bacteria and germs
- Vinegar and hydrogen peroxide are natural disinfectants
- Essential oils have antimicrobial properties
Safety Precautions and Warnings ⚠️
Important Safety Guidelines
- Never mix vinegar and hydrogen peroxide: This creates toxic peracetic acid
- Avoid open flames: Baking soda and vinegar may foam
- Ventilation is key: Keep bathroom well-ventilated
- Protect eyes: Wear protective eyewear
- Glove up: Even natural ingredients can irritate skin
- Surface test: Always test on a small hidden area first
- Avoid acid on stone: Never use vinegar on natural stone tiles
When to Seek Professional Help 🛠️
- Extensive mold growth
- Grout that is crumbling or damaged
- Grout with severe discoloration
- When multiple natural methods have failed
What NOT to Do When Cleaning Grout
Critical Warnings
- Do NOT use bleach with acid cleaners – Creates toxic fumes
- Do NOT mix vinegar with hydrogen peroxide – Creates peracetic acid
- Do NOT scrub too aggressively – Damages grout
- Do NOT neglect sealing – Unsealed grout attracts stains
- Do NOT clean natural stone tiles with vinegar – Acid damages stone
- Do NOT ignore warning signs – Mold can cause health issues
- Do NOT skip protective gear – Even natural cleaners can irritate
Checklist for Complete Grout Cleaning
Deep Clean Checklist
- □ Clear bathroom area
- □ Sweep or vacuum surfaces
- □ Choose appropriate natural cleaner
- □ Gather all necessary tools
- □ Test on inconspicuous area first
- □ Apply cleaner to grout
- □ Allow appropriate dwell time
- □ Scrub in circular motions
- □ Rinse thoroughly with clean water
- □ Inspect results; repeat if needed
- □ Dry the area
- □ Optionally, apply sealer
- □ Restore bathroom items
Trusted Expert References and Sources
Scientific Studies and Research
- Environmental Protection Agency (EPA): “Safer Choice Standards”
- Environmental Working Group (EWG): “Guide to Healthy Cleaning”
- Journal of Environmental Management: “Toxicity of Household Cleaners”
- American Journal of Infection Control: “Natural Disinfectants”
Professional Associations
- American Cleaning Institute (ACI)
- International Sanitary Supply Association (ISSA)
- National Association of Professional Cleaners (NAPC)
Expert Recommendations
- Green Cleaning Experts: “Homemade Vinegar Cleaners”
- Mayo Clinic: “Toxic Cleaner Risks”
- CDC: “Home Cleaning and Disinfection”
Pros and Cons of Natural Grout Cleaning
Pros ✅
- Safe for Health: Non-toxic, no harmful fumes
- Cost-Effective: Ingredients are inexpensive
- Eco-Friendly: Biodegradable, no harmful environmental impact
- No Harsh Chemicals: Safe for families, pets, and the environment
- Effective: Works well on most grout stains
- Simple: Uses pantry ingredients
- Good Scent: Natural fresh fragrances
- Safe on Various Surfaces: Gentle enough for most tile types
- No Respiratory Irritation: Safe for those with asthma or allergies
Cons ❌
- Takes Longer: Slower acting than chemical cleaners
- More Scrubbing: May require extra elbow grease
- Not Effective on All Stains: Some stubborn stains need multiple applications
- Shorter Shelf Life: Natural cleaners don’t last as long
- Surface Compatibility: Can damage natural stone tiles
- Prep Time: Mixing solutions takes time
- Less Convenient: Can’t just buy off the shelf
- Requires Experimentation: Finding the right formula may take trial and error
Expert View: “While natural cleaners may require more effort initially, the health and environmental benefits make them worthwhile. Plus, the satisfaction of achieving a clean bathroom without harming the planet is priceless.” – Niaz Khan, Sustainable Living Expert
Frequently Asked Questions (YES/NO FAQs)
Q1: Does baking soda and vinegar really clean grout effectively?
YES – This natural combination dissolves mineral buildup and soap scum, though stubborn stains may require multiple applications.
Q2: Is it safe to use hydrogen peroxide on colored grout?
NO – Hydrogen peroxide may lighten or discolor colored grout; always test in an inconspicuous area first.
Q3: Does vinegar kill mold and mildew on grout?
YES – White vinegar is effective against many types of mold and mildew, but severe infestations may require professional treatment.
Q4: Should I seal grout after deep cleaning?
YES – Sealing creates a protective barrier against future stains and makes cleaning significantly easier.
Q5: Is lemon juice effective for grout cleaning?
YES – Lemon juice’s natural acidity dissolves mineral deposits, though it’s less potent than vinegar.
Q6: Can I use natural grout cleaners on all tile types?
NO – Natural stone tiles (marble, limestone, travertine) are damaged by acid cleaners like vinegar and lemon juice.
Q7: Does oxygen bleach produce harmful fumes?
NO – Oxygen bleach (sodium percarbonate) releases oxygen and is much gentler than chlorine bleach.
Q8: Is it possible to clean grout without scrubbing?
NO – Mechanical action is necessary for effective grout cleaning, though steam cleaners reduce scrubbing effort.
Q9: Does natural cleaning kill bacteria effectively?
YES – Hydrogen peroxide and vinegar have antibacterial properties, though they may require more contact time than chemical disinfectants.
Q10: Should I hire a professional for grout cleaning instead?
NO – Most grout can be effectively cleaned with natural methods and patience; professionals are recommended only for severe damage or mold.
Conclusion
Cleaning bathroom grout without harsh chemicals is not only possible but remarkably effective when done properly. By understanding the nature of grout, choosing the right natural ingredients, and following proven techniques, you can restore your bathroom to its original beauty without exposing your family to harmful toxins.
The journey to pristine grout starts with patience and persistence. Natural cleaners may take a little longer than their chemical counterparts, but the benefits far outweigh the extra effort. You’ll enjoy:
- A safer home environment
- Reduced environmental impact
- Significant cost savings
- The satisfaction of seeing beautiful results
Remember the key principles of natural grout cleaning:
- Understand your grout type
- Use the right natural ingredients
- Apply proper techniques
- Be patient and persistent
- Maintain regularly
- Consider sealing for protection
Armed with this comprehensive guide, you now have everything you need to tackle even the most stubborn grout stains using only natural, safe, and effective ingredients. Your bathroom will thank you, and so will your family’s health and the environment.
Final Thought: “The best cleaning routine isn’t the one that’s fastest or harshest – it’s the one that protects what matters most: your health, your home, and your planet.” 🌍💚
Premium Expert Tips by Niaz Khan 🌟
After decades of experience and countless successful grout restorations, I’ve compiled these premium tips to help you achieve even better results:
🎯 Niaz’s Top 10 Natural Grout Cleaning Secrets
- ✨ The Temperature Trick: Warm your vinegar slightly before using – it increases cleaning effectiveness by up to 30%. Never microwave vinegar; heat it in a pan or glass measuring cup.
- 🔄 The Dry Brush Method: Before applying any cleaner, dry brush the grout vigorously. This removes surface debris and allows the cleaner to penetrate deeper.
- ⏰ The Overnight Soak: For truly stubborn stains, apply your cleaning paste and cover with plastic wrap. Let it sit overnight. The extended exposure time works wonders.
- 🔬 The Quality Ingredient Principle: Use pure, quality ingredients. Cheap, diluted vinegar (less than 5% acetic acid) won’t deliver the same results.
- 🧹 The Tiny Brush Advantage: Keep an old electric toothbrush for grout cleaning. The vibrations do the heavy work with less effort on your part.
- 💧 The No-Puddles Rule: Standing water leads to more grout stains. Use a small squeegee after every shower to prevent water accumulation.
- 🧪 The 30-Day Sealing Rule: Seal your grout every 30 days for at least the first three months after a deep clean. This gives maximum protection before stains can resettle.
- 🌿 The Essential Oil Touch: Add 10-15 drops of tea tree or eucalyptus oil to your cleaning solution. Both have natural anti-mold properties.
- 📊 The Dilution Experiment: Most store-bought natural cleaners are too diluted. Mix your own for consistent, powerful results.
- 📱 The Photo Record: Take before, during, and after photos. This helps you track what works best for your specific grout.
💼 Commercial Strategy Tip
For those considering turning their natural cleaning skills into a business, focus on:
- Target Audience: Health-conscious homeowners and families with small children
- Value Proposition: “Healthy home, healthy family, no chemicals”
- Specialization: Focus on grout cleaning as a niche service
- Pricing Structure: Premium pricing for premium, safe service
Remember: Natural cleaning is a skill that improves with practice. Each cleaning session teaches you more about what works for your specific bathroom conditions.
Disclaimer ⚠️
This article provides general informational guidance only and does not constitute professional cleaning advice. Always test all cleaning methods on a small, inconspicuous area first. Individual results may vary. The author and publisher make no guarantees regarding results and cannot be held liable for damages or injuries resulting from the use of these methods. Consult professionals for severe mold issues or structural grout damage. When in doubt, seek professional assistance.
Written By Niaz Khan

Niaz Khan is an SEO blogger, digital marketer, and content writer with 5+ years of experience in search engine optimization, content strategy, and online growth.
Focused on people-first content and Google-compliant SEO practices.