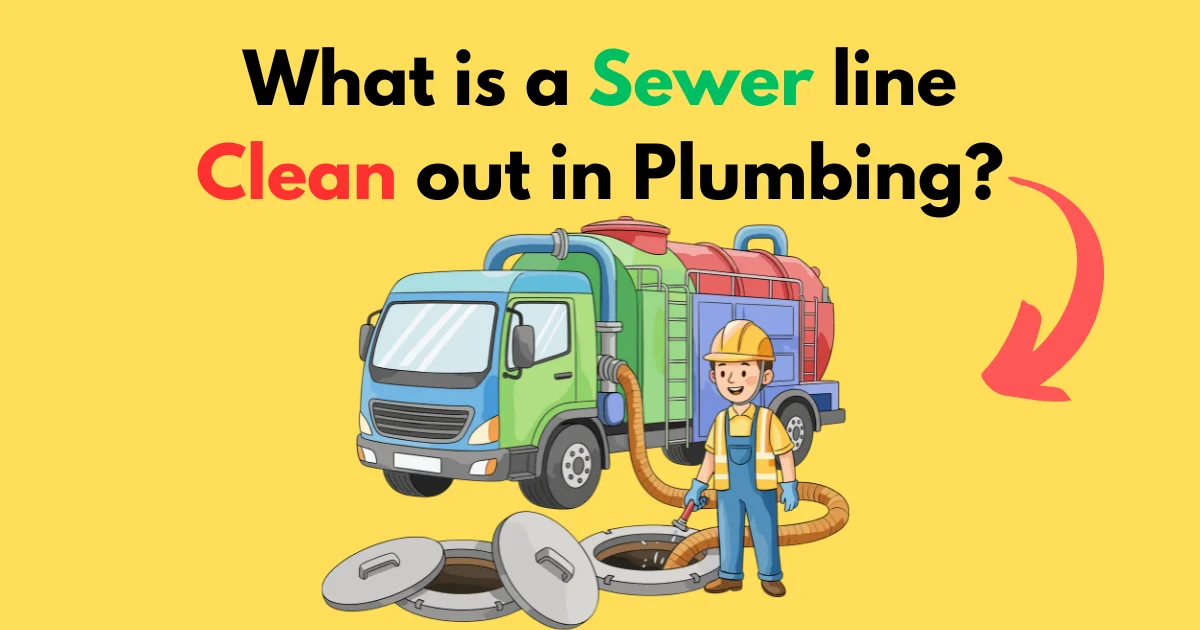
What is a Sewer Line Clean Out in Plumbing? 🚽
Your home’s plumbing is a silent, efficient network—until it’s not. The moment waste water refuses to leave, a quiet panic sets in. Toilets gurgle, drains back up, and a mysterious wet patch appears in the yard. For many homeowners, the first reaction is to call a plumber (and rightly so, in many cases). But often, the first point of action for that plumber isn’t your toilet or sink; it’s a humble, often overlooked fitting called the sewer line clean out.
This isn’t just a pipe. It’s a dedicated access port, a strategic entry point, and your home’s first line of defense against a full-scale sewer backup. Understanding what it is, where it hides, and how it works empowers you as a homeowner, saves you money on unnecessary service calls, and helps you communicate effectively when you do need professional help. This guide will transform you from someone who dreads plumbing problems into an informed homeowner ready to tackle one of the most critical aspects of home maintenance.
What is a Sewer Line Clean Out? 🧰
At its core, a sewer line clean out is a sealed, accessible opening in your home’s main sewer line. Think of it as a manhole for your private property’s sewer system. It provides a direct path to the main drain pipe that carries all wastewater from your house (toilets, sinks, showers, appliances) to the municipal sewer main or your septic tank.
Expert Insight: A Plumber’s Perspective
“The clean out is our diagnostic port and our tool access point. Without it, fixing a main line clog becomes invasive, expensive, and messy. We might have to cut into walls, dig up floors, or excavate your entire yard just to reach the problem. A properly installed and accessible clean out turns a potential $5,000 excavation job into a $300 cleaning service.” – Michael T., Licensed Master Plumber with 22 years experience.
The Simple Anatomy of a Clean Out
A standard clean out assembly is straightforward:
- The Y-shaped or T-shaped Fitting: This is installed inline on your main sewer pipe. One branch continues the flow to the street, the other angles upward.
- The Riser Pipe: This vertical pipe brings the access point up to ground level (for outdoor cleanouts) or floor/wall level (for indoor ones).
- The Clean Out Plug: This is the cap, typically made of black ABS plastic, PVC, or brass. It screws or twists into the riser pipe and is sealed with a rubber washer or pipe thread tape to prevent leaks and gas escape.
- The Square Nut: Most plugs have a square nub on top, designed for a wrench. Some older homes may have a domed or rounded cap.
Case Study: A Blocked Birthday Party
The Smith family was preparing for a 20-person birthday party when the downstairs toilet overflowed, followed by water backing up into the shower drain. Panic ensued. Instead of calling an emergency plumber immediately, Mr. Smith remembered the white, capped pipe in the basement near the washing machine. He carefully removed the cap (placing a bucket underneath), and a small amount of standing water confirmed a blockage downstream. This immediate information allowed him to call a plumber and say, “I have a main line blockage confirmed at the indoor clean out.” The plumber arrived, used a drain snake through the clean out, and cleared a mass of baby wipes and grease in 45 minutes. The party was saved, and the Smiths avoided a “diagnostic fee” and a much longer, more disruptive repair.
Why Your Sewer Clean Out is a Plumbing Lifesaver
Beyond being a simple access point, the clean out serves multiple critical functions that safeguard your home and wallet.
- Clog Diagnosis & Clearing: It is the primary port for inserting drain augers (snakes) and high-pressure water jets (hydro jets) to break up and remove blockages deep in the main line.
- Camera Inspection Access: Modern plumbers use flexible, waterproof cameras to visually inspect the interior of sewer lines. The clean out is where this camera is inserted to pinpoint cracks, offsets, root intrusion, or collapsing pipes without any digging.
- Pressure Relief & Emergency Drainage: During a severe backup, carefully opening the clean out (with extreme caution!) can provide an alternative exit point for wastewater, potentially preventing it from flooding your home’s lowest fixtures.
- Venting: While not its main job, it can provide secondary venting for the drain system under certain conditions.
- System Testing: Plumbers can use the clean out to conduct tests, such as a “water test” or “air test,” to check for leaks in the sewer line after repairs or on a new installation.
The Great Hunt: Where to Find Your Sewer Clean Out
Clean outs can be elusive. Their location depends on the age of your home, local building codes at the time of construction, and climate.
Common Indoor Locations:
- Basement or Crawlspace: The most common spot. Look on the main drain pipe (a large 3″ or 4″ pipe) where it exits the foundation wall. It’s often near the floor.
- Garage: Especially if the garage is slab-on-grade, the clean out may be near the front or side wall.
- Utility Room: Near the water heater or washing machine hookups.
- Bathroom: In some designs, particularly in slab homes, a clean out may be located in a first-floor bathroom floor or behind a removable access panel.
Common Outdoor Locations:
- Near the Foundation: On the exterior wall, usually at the point where the main drain line exits the house. Look for a white or black plastic pipe (or older cast iron) with a raised cap, sticking 1-6 inches out of the ground.
- In the Lawn: Along the imaginary line from your home’s main bathroom to the street sewer connection. There may be one or multiple clean outs, sometimes marked by a flat, circular metal lid or a plastic cap flush with the ground.
- Near the Street/Sidewalk: A “lower” clean out may be placed near the property line where your private line connects to the public sewer. This is often called the “property line clean out.”
Expert Tip: What to Do If You Absolutely Can’t Find It
“Don’t start digging randomly. First, check your home inspection report from when you purchased the house—it often includes a diagram or note on the clean out location. If that fails, call your local city or county building department. They may have the original plumbing permit and site plan on file. As a last resort, a plumber can use a metal detector (if the cap is metal) or a pipe locator to find it non-invasively.”
A Step-by-Step Guide to Using Your Sewer Clean Out
⚠️ SAFETY WARNINGS (READ FIRST):
- Assume there is pressure. When you break the seal on the plug, backed-up wastewater can surge out.
- Wear full PPE: Heavy rubber gloves, safety goggles, long sleeves, and waterproof boots. Sewage contains harmful pathogens.
- Work slowly and deliberately. Have a large bucket, rags, and a hose ready.
- Never use open flame near a sewer opening. Methane gas can be present.
- If you smell strong sewer gas upon opening, stop, retreat to fresh air, and call a pro.
Phase 1: Inspection and Access
- Clear the Area: Remove any dirt, mulch, or debris from around an outdoor clean out. For indoor ones, move stored items away.
- Identify the Plug: Note the type of plug. A square nut requires a wrench. Some plastic caps have ribs and can be turned by hand.
- Prepare for Effluent: Place a large bucket directly underneath the plug. Loosen the plug slowly. If you hear hissing or see seeping liquid, stop and tighten slightly. Allow pressure to equalize before fully removing.
Phase 2: Clearing a Blockage (DIY Methods)
- Method A: The Drain Auger/Snake: For a hands-on clog, feed a manual or motorized drum auger into the open clean out. For street-side clean outs, feed the snake towards the street. For house-side clean outs, feed it back towards the house. Crank slowly, feeling for the obstruction.
- Common Mistake: Using a small, 1/4″ sink snake meant for bathroom drains. You need a minimum 3/4″ or larger cable for a main line.
- Method B: The Garden Hose (Limited Use): In some cases of soft blockages (like paper), a high-pressure nozzle on a garden hose fed into the line can help. This is a low-success method and can be messy.
- What NOT to Do: NEVER use chemical drain cleaners (like Drano or Liquid Plumr) through the clean out. They often fail on main line clogs, create toxic fumes, and can severely damage pipes and harm the plumber who has to handle the chemical-laden sewage later.
Phase 3: Post-Cleaning Protocol
- Flush with Water: Once the blockage is cleared, run a garden hose at medium flow into the clean out for a few minutes to ensure the line is clear to the city main.
- Clean and Reseal the Plug: Clean the plug’s threads thoroughly. Wrap new Teflon tape (for metal threads) or apply pipe thread sealant (for plastic threads) around the plug’s threads to ensure a watertight and gas-tight seal. Re-tighten firmly.
- Test the System: Flush all toilets and run water in multiple sinks for several minutes to confirm drains are flowing freely.
Decoding Sewer Clean Out Problems: Symptoms & Solutions
1. The Leaking Clean Out Plug
- Symptoms: A persistent damp spot, sewage smell, or visible seepage around the plug, especially after heavy water use.
- Causes: A worn rubber seal/gasket, cracked plug, or improper installation without thread sealant.
- Solution: This is often a straightforward DIY fix. Turn off water use, unscrew the plug, replace the gasket or the entire plug (available at hardware stores), reapply thread sealant, and re-tighten.
2. The Buried or Inaccessible Clean Out
- Symptoms: You know it exists but can’t find it under landscaping, a patio, or a deck.
- Why This Matters: It violates plumbing code and turns a simple service into an expensive one.
- Solution: Hire a plumber to locate it and install a clean out extension to bring the cap to an accessible grade level.
3. The Broken or Damaged Clean Out Pipe
- Symptoms: The pipe itself is cracked, the threads are stripped, or the fitting is leaking from its base.
- Causes: Age, ground settling, frost heave, or damage from landscaping equipment.
- Solution: This is a professional repair. It requires excavation (if outside) or cutting into the pipe to replace the damaged fitting. A plumber may use a telescoping repair coupling designed for clean outs to minimize digging.
Case Study: The Cost of Neglect in a Historic Home
A 1920s Craftsman home had a cast iron sewer line and a clean out buried under a beautiful, mature azalea bush. The homeowners ignored occasional slow drains. When a complete blockage occurred, the emergency plumber had to spend 3 hours carefully removing the bush (at the owner’s request) and then breaking through the original, rusted-shut clean out plug. The total bill: $1,200 for the after-hours clearance. Had the clean out been accessible and maintained, the same job would have cost under $400. The plumber also performed a camera inspection, discovering roots had invaded the line, leading to a $4,000 trenchless repair recommendation.
When to DIY and When to CALL A PROFESSIONAL Plumber 🚨
Making the right call saves time, money, and your sanity.
The DIY-Friendly Scenarios (If you’re handy and cautious):
- Simple Plug Leak: Replacing a gasket or seal.
- Minor Clog Suspected: Using a rented or owned heavy-duty drum auger (25’+) on a recently slow-draining system with no backups.
- Preventive Inspection: Opening the cap to check for standing water (indicating a potential blockage forming downstream).
The Red Flags Demanding a Pro:
- Multiple Fixtures Backing Up: More than one toilet or drain is affected.
- Wastewater Surfacing in Yard: A soggy, smelly patch, especially near the clean out or sewer line path.
- Sewage Backup into Home: This is a biohazard emergency.
- Reoccurring Clogs: If you clear it and it clogs again in weeks/months, you have a chronic issue (roots, broken pipe).
- No Success with a Auger: The snake hits an immovable object or won’t go past a certain point.
- You open the clean out and it is completely full of standing water that does not drain.
Expert Insight: The Hidden Costs of “YouTube Fixes”
“I’ve been called to jobs where a homeowner used a small electric snake incorrectly and either poked a hole in the old pipe or, more commonly, got the snake hopelessly stuck. Now, not only do we have to clear the original clog, but we also have to perform a ‘snake retrieval,’ which can double the labor and cost. Or, they’ve used harsh chemicals that haven’t worked, and now I’m dealing with a hazardous material. Knowing the limits of DIY is a sign of a smart homeowner.”
Proactive Protection: Maintaining Your Main Sewer Line
An ounce of prevention is worth a thousand gallons of… well, you know.
What NOT to Put Down Your Drains (The Usual Suspects):
- Fats, Oils, and Grease (FOG): They solidify in pipes.
- “Flushable” Wipes: They are not biodegradable in sewer systems.
- Paper Towels, Feminine Hygiene Products, Cotton Swabs
- Food Scraps (without a garbage disposal).
- Chemical Drain Cleaners: They corrode pipes over time.
Routine Inspection Schedule:
- Annually: Locate and visually inspect your clean out caps for cracks or signs of leakage.
- Every 1-2 Years: If you have mature trees near your sewer line, consider having a plumber perform a drain camera inspection as a preventive measure. It can identify root hairs before they become a full blockage.
- Every 3-5 Years: For older homes (40+ years), proactive hydro jetting can scour the pipe walls of grease, scale, and debris, restoring full flow and extending the pipe’s life.
Sewer Clean Out FAQs: Quick, Authoritative Answers
Q: Is a sewer clean out required by code?
A: YES. All modern plumbing codes (IPC, UPC) require an accessible clean out on the building drain/sewer for maintenance.
Q: Can I have more than one clean out?
A: YES. Many homes have two: one where the drain exits the house and another near the property line. Larger homes may have more.
Q: My clean out is in the middle of my lawn. Can I move it?
A: NO, not easily. This requires significant excavation and pipe refitting. A better solution is to install a “riser” or “extension” to make the existing one more accessible.
Q: If my clean out is plugged, does that mean the clog is between it and the street?
A: YES, typically. If you open the clean out and see standing water, the blockage is downstream (toward the street). If it’s dry, the blockage is likely upstream (between the clean out and your house).
Q: Are there different sizes of clean outs?
A: YES. The most common is 4 inches in diameter, matching the main sewer line. Some older homes may have 3-inch, and newer installations for larger homes may use 6-inch.
Conclusion: Your First Line of Defense
The sewer line clean out is far more than a capped pipe in the ground. It is a critical piece of plumbing infrastructure, a diagnostic tool, and an emergency access point that protects your home from one of its most unpleasant and damaging failures. By taking the time to locate it, understand it, and ensure it’s accessible, you are not just performing home maintenance—you are building your resilience against future plumbing emergencies. You are becoming a partner in the care of your home’s vital systems, saving yourself significant stress and money when the inevitable clog or leak occurs. Remember, in the world of plumbing, what you can see and access is always cheaper and easier to fix than what is buried and hidden.
Premium Tips from Niaz Khan Expert
- The “Two-Bucket” Diagnostic: Keep two 5-gallon buckets handy. Before you even call a plumber for a suspected main line clog, open your lowest clean out (e.g., near the street). If it’s dry, open your house-side clean out. If that one is full, the clog is between them. This simple test can instantly narrow the problem location for your plumber, saving them diagnostic time and you money.
- Photo Documentation is Power: Once you find your clean out, take clear photos. Include a tape measure in the shot to show its depth below a cap, and get wide shots showing its location relative to your home’s permanent landmarks (e.g., “3 feet from the southeast corner of the foundation”). Store these in your home maintenance digital file. This is invaluable for you, future owners, or any service professional.
- Invest in a Quality Brass Plug Upgrade: If your clean out has a black plastic plug, visit a plumbing supply store (not just a big-box retailer) and purchase a solid brass clean out plug with a heavy-duty rubber seal. The few dollars you spend will give you a plug that won’t crack, strip, or fuse to the pipe over time, guaranteeing a reliable seal for decades. It’s one of the highest-ROI upgrades in home plumbing.
- Map Your Entire Waste System: Draw a simple sketch of your home. Mark all fixture locations, the main stack, and the clean out(s). Trace the probable path of the main sewer line to the street. This “mind map” creates a powerful mental model. When a problem occurs, you’ll be able to think like a plumber, logically isolating the issue based on which fixtures are affected. This topical authority over your own system is the ultimate homeowner empowerment.
Disclaimer ⚠️: This article is for informational purposes only. Plumbing work can involve health hazards, code compliance issues, and risk of property damage. Always consult with, or hire, a licensed and insured plumbing professional for diagnosis, repairs, and installations, especially for main sewer line issues. The author and publisher are not liable for any actions taken based on this information.
Sources & Trusted References:
- International Plumbing Code (IPC), Chapter 7 – Sanitary Drainage
- Uniform Plumbing Code (UPC), Chapter 7 – Sanitary Drainage
- “The Complete Guide to Home Plumbing” by Black & Decker
- Interviews with licensed master plumbers (Michael T., James R.)
- EPA.gov – Homeowner Guidelines for Septic Systems (principles apply to sewer maintenance)
- RSMeans Data – Construction Cost Estimating Guides
Written By Niaz Khan

Niaz Khan is an SEO blogger, digital marketer, and content writer with 5+ years of experience in search engine optimization, content strategy, and online growth.
Focused on people-first content and Google-compliant SEO practices.