Table of Contents
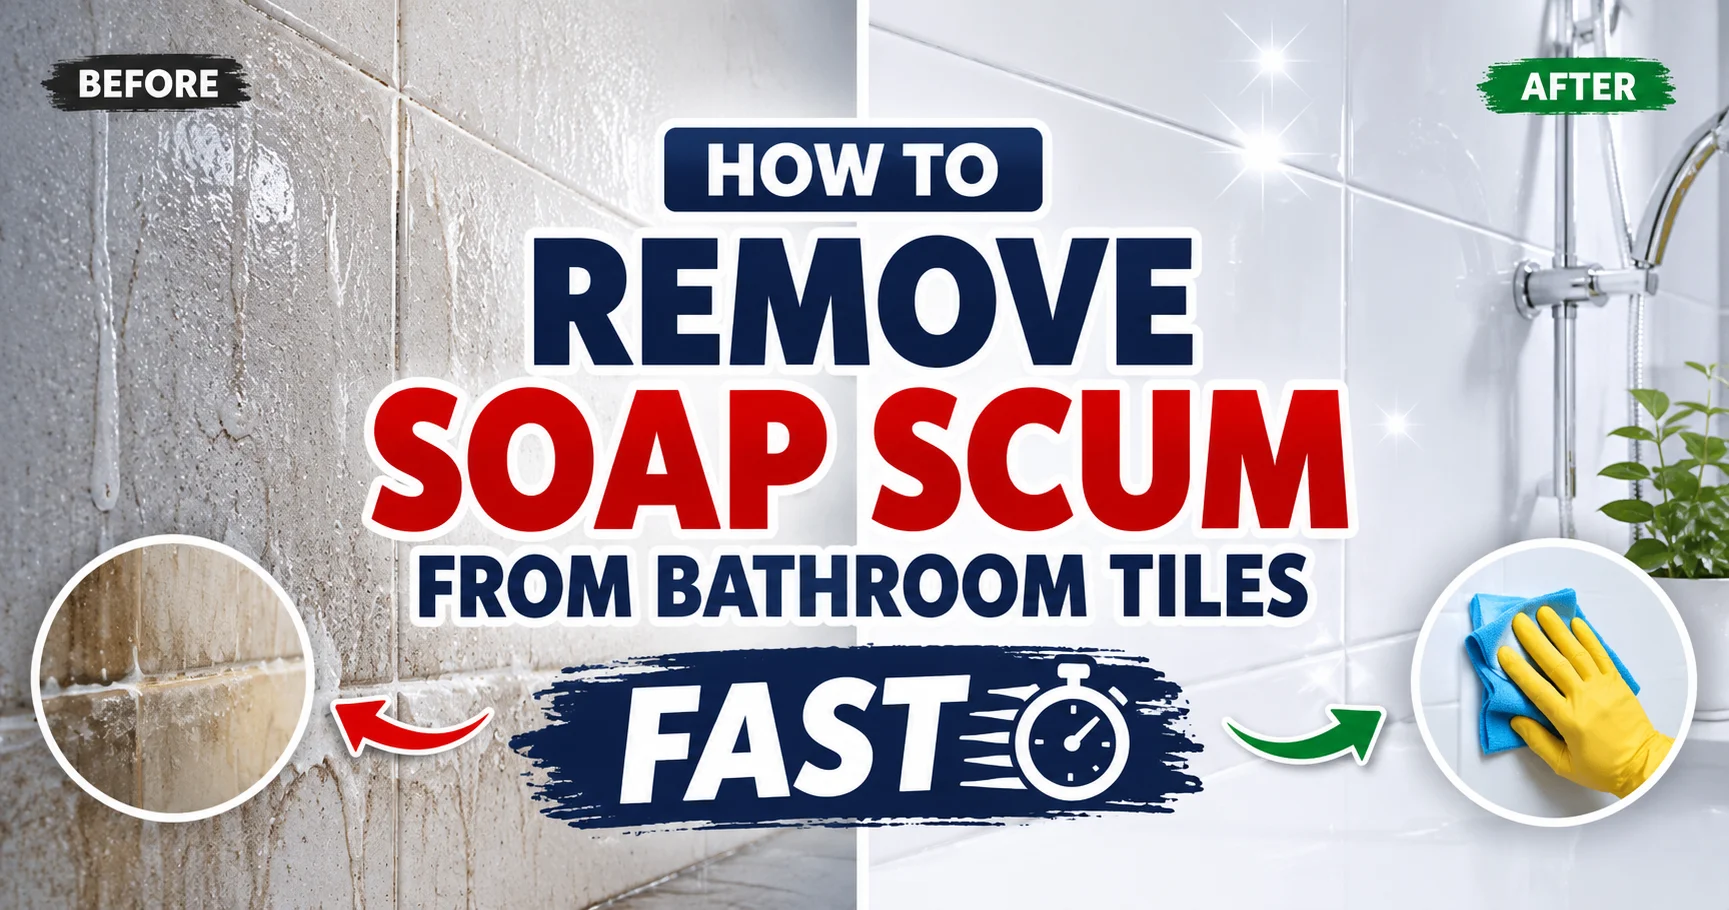
ToggleHow to Remove Soap Scum From Bathroom Tiles Fast
Introduction: The Battle Against Soap Scum
Every homeowner knows the frustration of stepping into a beautifully decorated bathroom only to be greeted by unsightly, filmy residue clinging to tiles and glass surfaces. That stubborn, grayish-white buildup that appears seemingly overnight is soap scum, and it’s one of the most persistent cleaning challenges in any household. 😩
Soap scum doesn’t just look unpleasant; it creates a breeding ground for bacteria, mold, and mildew, potentially affecting your family’s health and bathroom hygiene. The good news? Learning how to remove soap scum from bathroom tiles fast is entirely possible with the right techniques, tools, and knowledge.
Understanding the Enemy: What is Soap Scum?
Soap scum is that frustrating residue formed when soap combines with mineral deposits from hard water. Think of it as an uninvited guest that overstays its welcome, sticking stubbornly to bathroom tiles, shower doors, sinks, and tubs. This filmy substance creates a rough, dull surface that traps dirt, dead skin cells, and bacteria, making your bathroom look perpetually unclean regardless of how often you clean it.
The chemical process is fascinating yet frustrating: when soap comes into contact with calcium and magnesium ions present in hard water, it forms an insoluble substance called “soap scum” or “lime soap.” This chemical reaction produces a sticky, greasy film that adheres firmly to surfaces, resisting regular cleaning efforts.
Why Soap Scum is More Than Just an Eyesore
Beyond aesthetics, soap scum poses several hidden dangers to your bathroom and health:
Health Concerns: Soap scum provides an ideal environment for microbial growth. Mold and mildew thrive on the organic matter trapped within soap scum, potentially triggering allergies, respiratory issues, and skin irritations. Black mold, in particular, can develop beneath soap scum layers, creating serious health hazards.
Surface Damage: Over time, soap scum can permanently etch and discolor tile surfaces, grout, and natural stone. The acidic nature of some soap scum compounds can eat away at protective sealants and finishes, leading to costly bathroom renovations.
Slippery Hazards: When soap scum combines with water, it creates surprisingly slippery surfaces in showers and tubs, increasing the risk of dangerous falls. This creates particular risks for elderly family members or young children.
Reduced Property Value: A bathroom marred by persistent soap scum buildup can significantly decrease your home’s value. Bathrooms are among the most scrutinized spaces during home inspections and viewings, and signs of poor maintenance can deter potential buyers.
The Hidden Dangers of Soap Scum
Beyond its unsightly appearance, soap scum creates a vicious cycle of cleaning difficulty. Each cleaning attempt that fails to fully remove the residue leaves behind more surface area for future soap scum to cling to, making each subsequent cleaning more challenging. This is why understanding how to remove soap scum from bathroom tiles fast is not just about cleaning once but establishing a sustainable maintenance routine.
The accumulation process accelerates when you have hard water, as mineral deposits provide additional binding sites for soap molecules. Areas with particularly hard water often experience soap scum buildup within days of cleaning, making prevention and quick intervention absolutely essential.
Understanding Soap Scum Formation
The Science Behind Soap Scum
To effectively combat soap scum, understanding its formation process is crucial. Soap molecules consist of two distinct ends: a hydrophilic (water-loving) head and a hydrophobic (water-repelling) tail. This structure allows soap to dissolve oils and grease, making it effective for cleaning.
However, when soap interacts with mineral ions in hard water, especially calcium and magnesium, something problematic happens. The mineral ions bind with the soap molecules to form insoluble fatty acid salts. These salts create the sticky, resistant compound known as soap scum, which doesn’t dissolve easily in water.
The reaction is essentially:
Soap + Hard Water Minerals (Calcium/Magnesium) → Insoluble Soap Scum
This chemical reaction makes soap scum remarkably difficult to remove with simple wiping or standard cleaning. The insoluble nature of soap scum means it requires specific chemical reactions or mechanical abrasion to break its bonds with tile surfaces.
Hard Water’s Role in Soap Scum
Hard water is the primary culprit behind persistent soap scum problems. Water hardness refers to the concentration of dissolved minerals, particularly calcium and magnesium. According to the U.S. Geological Survey, approximately 85% of American homes have hard water, making soap scum a widespread issue.
Impact of Hard Water Levels:
| Water Hardness Level | Mineral Content (mg/L) | Soap Scum Severity |
|---|---|---|
| Soft | 0-60 | Minimal buildup |
| Moderately Hard | 61-120 | Noticeable accumulation |
| Hard | 121-180 | Significant soap scum |
| Very Hard | 180+ | Severe, rapid buildup |
Homes with hard water find that soap scum forms more quickly and becomes more difficult to remove. The mineral deposits create a rough surface that provides excellent adhesion points for soap molecules, creating a stubborn composite buildup.
How Different Soaps Contribute to the Problem
The type of soap you use significantly impacts soap scum formation:
Bar Soaps: Traditional bar soaps are formulated with fatty acids that readily react with hard water minerals. These create the most significant soap scum compared to other soap forms.
Liquid Soaps: While better than bar soaps, liquid soaps still contain ingredients that contribute to soap scum formation, especially when combined with hard water.
Body Washes: Modern body washes contain synthetic surfactants that are less prone to creating soap scum. However, some ingredients can still contribute to buildup.
Shampoos and Conditioners: Hair care products often contain conditioning agents that can contribute to a different type of scum buildup, combining with soap residues and minerals.
Understanding these differences helps homeowners make informed choices about the products they use in their bathrooms, potentially reducing soap scum formation from the source.
Essential Supplies for Soap Scum Removal
Basic Tools You’ll Need
Before diving into the actual cleaning process, gathering proper supplies ensures efficient and effective removal. Here’s your essential toolkit for how to remove soap scum from bathroom tiles fast:
Cleaning Tools:
- Non-abrasive sponges: Different grades for different surfaces
- Soft-bristled brushes: For grout lines and textured surfaces
- Squeegee: Essential for glass shower doors
- Microfiber cloths: Perfect for final polishing
- Spray bottles: For DIY solutions
- Old toothbrushes: Excellent for detailed grout work
- Scrub pads: Choose appropriate abrasiveness for your tile type
Protective Gear:
- Rubber gloves: Chemical protection
- Safety goggles: Eye protection when using chemical cleaners
- Respirator mask: For chemical-heavy situations
- Knee pads: For comfortable cleaning sessions
Natural Cleaning Solutions
Natural cleaners offer safe, effective alternatives to harsh chemicals while being environmentally friendly and budget-conscious:
White Vinegar Solution: A classic cleaning powerhouse. Mix one part distilled white vinegar with one part warm water. The acid in vinegar breaks down soap scum’s alkaline structure.
Baking Soda Paste: Combine baking soda with water to create a thick paste. This provides gentle abrasive action that lifts soap scum without scratching.
Lemon Juice: Contains citric acid, which excels at breaking down mineral deposits and soap residues.
Borax: This natural mineral can be mixed with water to create an effective cleaning solution.
Essential Oils: Adding drops of tea tree or eucalyptus oil provides natural antibacterial properties and pleasant fragrance.
Commercial Products Worth Investing In
When natural solutions aren’t sufficient, commercial products designed specifically for soap scum removal can be highly effective:
CLR (Calcium, Lime, Rust Remover): Particularly effective for hard water mineral deposits combined with soap scum.
Lysol Power Foam: Creates foam that clings to surfaces, allowing active ingredients to work on stubborn residue.
Scrubbing Bubbles: Known for its penetrating foam action on soap scum.
Mr. Clean Magic Eraser: Provides gentle abrasion combined with cleaning agents.
Tilex Mold and Mildew Remover: Great for areas where soap scum has developed mold.
Biokleen Bio-Kleen: An eco-friendly commercial option effective on soap scum.
Safety Equipment
While cleaning, protecting yourself should be a priority. Essential safety equipment includes:
- Heavy-duty rubber gloves: Prevent skin irritation from cleaning chemicals
- Protective eyewear: Shields against chemical splashes
- Respirator or face mask: For areas with chemical fumes
- Knee pads: Comfort during extended cleaning sessions
- Non-slip shoes: Safety when working in wet areas
Pre-Cleaning Preparation: Setting Up for Success
Proper Ventilation and Safety
Before starting any soap scum removal process, proper preparation prevents problems:
Ventilation Strategy:
- Open windows and doors to maximize airflow
- Turn on exhaust fans to remove chemical fumes
- Consider using portable fans for additional air circulation
- Avoid cleaning in enclosed spaces without ventilation
Safety Checklist:
- Read product labels thoroughly
- Test cleaners on inconspicuous areas first
- Ensure you have adequate light to see what you’re cleaning
- Remove any electrical appliances from cleaning areas
- Keep cleaning products out of reach of children and pets
Surface Assessment
Understanding your tile type is crucial for effective soap scum removal:
Ceramic Tile: Most common bathroom tile, relatively durable but can be damaged by abrasive cleaning.
Natural Stone: Includes marble, granite, and travertine requiring specialized care.
Porcelain Tile: Dense and resistant but can crack if not handled properly.
Glass Tile: Beautiful but shows spots easily and requires gentle cleaning.
Grout: The porous material between tiles that absorbs stains and is challenging to clean.
Protecting Surrounding Areas
Proper preparation also includes protecting other bathroom fixtures:
Cover Fixtures: Use plastic wrap or towels to protect chrome, brass, and other metal finishes.
Protect Grout: If using acidic cleaners, consider applying a grout sealant before deep cleaning.
Floor Protection: Place towels or drop cloths to protect floors from drips and spills.
Remove Accessories: Take down shower caddies, soap dishes, and other accessories for thorough cleaning.
Method 1: The Vinegar and Baking Soda Power Combo
The vinegar and baking soda combination is arguably the most effective natural solution for how to remove soap scum from bathroom tiles fast. This dynamic duo works through a powerful chemical reaction that breaks down soap scum without harsh chemicals.
Step-by-Step Application Process
Step 1: Prepare the Solution
Mix equal parts warm water and white vinegar in a spray bottle. Vinegar’s acid content dissolves mineral deposits while breaking down soap scum’s alkaline structure.
Step 2: Apply Vinegar Solution
Spray the vinegar solution generously over soap-scummed tiles. Allow it to sit for 10-15 minutes. The acidic vinegar will begin dissolving the soap scum and breaking its bond with the tile surface.
Step 3: Apply Baking Soda
Sprinkle baking soda directly onto the vinegar-wet surfaces. The combination of vinegar’s acid and baking soda’s base creates a foaming reaction that helps lift soap scum.
Step 4: Create a Paste
For stubborn areas, mix baking soda with a small amount of vinegar to create a thick paste. Apply this directly to stubborn spots.
Step 5: Agitate
Using a non-abrasive sponge or soft-bristled brush, gently scrub the surface in circular motions. The baking soda provides gentle abrasion while the vinegar continues dissolving the scum.
Step 6: Let It Sit
Allow the paste to sit for an additional 10 minutes for stubborn buildup. For particularly old soap scum, consider covering the paste with plastic wrap to prevent drying.
Step 7: Rinse Thoroughly
Rinse the surface with warm water, ensuring all cleaning solution residues are removed. For glass shower doors, use a squeegee immediately to prevent water spots.
Step 8: Final Polish
Use a microfiber cloth to buff surfaces to a sparkling shine.
Optimal Ratios and Timing
Vinegar to Water Ratio: For general cleaning, 1:1 vinegar-to-water is effective. For stubborn buildup, increase to 2:1 vinegar-to-water.
Application Time: Allow solutions to work for 5-15 minutes depending on severity. Check progress regularly to prevent surface damage.
Baking Soda Paste Consistency: The paste should be thick enough to cling to vertical surfaces but wet enough to easily apply.
Drying Time: Allow tiles to air dry completely after cleaning, or use a microfiber cloth for a streak-free finish.
Expert Tips for Best Results
“Understanding the chemistry behind soap scum removal makes all the difference. The key is to break the bond between soap residues and mineral deposits through proper chemical and mechanical action.” – Niaz Khan, Professional Cleaning Specialist
Heating Vinegar: Warm vinegar works faster on soap scum. Microwaving vinegar for 30 seconds before mixing can increase effectiveness.
Combination Application: For best results, don’t just choose vinegar OR baking soda—use both in sequence for maximum impact.
Pre-Treat: For heavily soiled areas, apply undiluted vinegar directly to stubborn spots before beginning the general cleaning process.
White Vinegar vs. Apple Cider Vinegar: Use white vinegar for bathroom cleaning—it’s more acidic and doesn’t leave brown stains.
Common Mistakes to Avoid
Using the Wrong Vinegar: Apple cider vinegar and other colored vinegars can stain surfaces. Always use distilled white vinegar.
Not Diluting Vinegar: Using undiluted vinegar on natural stone can cause etching. Always dilute unless the surface is rated for acid exposure.
Mixing Vinegar and Bleach: This creates toxic chlorine gas. Never mix these two cleaning agents.
Using Metal Tools: Metal scrubbers can scratch and damage tile surfaces, allowing bacteria to proliferate in scratches.
Method 2: Professional-Grade Commercial Cleaners
When natural remedies aren’t sufficient, commercial products formulated specifically for soap scum removal can be highly effective. Understanding which products work best and how to apply them properly is crucial for understanding how to remove soap scum from bathroom tiles fast.
Top Recommended Products
Lysol Lime & Rust Remover: This product contains phosphoric acid, which effectively dissolves mineral deposits while breaking down soap residues. Its thick formula clings to surfaces for extended contact time.
Mr. Clean Magic Eraser: This melamine foam sponge works through micro-scrubbing action, lifting soap scum without chemicals. It’s particularly effective for glass shower doors.
CLR Calcium, Lime & Rust Remover: The acidic formula is specifically designed for hard water mineral deposits, making it excellent for tackling soap scum complex.
Kaboom Shower Cleaner: This foam formula clings to surfaces, allowing active ingredients to break down soap scum before rinsing away.
Zep Dried-On Lime & Calcium Remover: Professional-grade product that quickly dissolves even stubborn soap scum.
Hydrogen Peroxide-Based Cleaners: These provide powerful oxidizing action that breaks down organic matter in soap scum without harsh acids.
Application Techniques
Proper Ventilation: Commercial products often contain strong chemicals. Ensure adequate ventilation before and during use.
Read Instructions Thoroughly: Different products have different application times and dilution requirements. Follow manufacturer instructions carefully.
Test on Inconspicuous Area: Before applying to visible surfaces, test the product on an unseen area to ensure it won’t damage or discolor tiles.
Apply Evenly: Use a spray bottle or applicator to apply product evenly to affected areas. Avoid pooling, which can cause uneven cleaning.
Allow Proper Dwell Time: Most commercial products need 2-10 minutes to work effectively. Don’t scrub immediately; allow the chemicals time to dissolve the soap scum.
Agitate Gently: Use appropriate brushes or sponges to agitate the surface. Avoid metal tools that can scratch tiles.
Rinse Thoroughly: Remove all cleaning product residues to prevent chemical buildup and potential damage.
Dry Properly: Use microfiber cloths or squeegees to remove all moisture and prevent water spots.
When to Use Chemical Solutions
Stubborn Buildup: When natural remedies fail to remove old, established soap scum.
Hard Water Heavy Areas: Homes with very hard water often benefit from chemical cleaners that specifically target mineral deposits.
Time Constraints: Chemical products often work faster than natural remedies.
Preventive Maintenance: Some commercial products provide protective coatings that make future cleaning easier.
Commercial Settings: In high-use bathrooms where cleanliness must be maintained quickly, chemical cleaners may be preferred.
Safety Precautions
Avoid Mixing Chemicals: Never mix different cleaning products, as this can create toxic gases.
Protect Skin and Eyes: Always wear gloves and goggles when handling chemical cleaners.
Follow Manufacturer Guidelines: Pay attention to recommended application times—leaving products too long can damage surfaces.
Store Properly: Keep cleaning products out of reach of children and pets.
Dispose Responsibly: Follow local guidelines for disposing of chemical cleaning products.
Method 3: The Magic of Lemon and Borax
For homeowners preferring natural alternatives, lemon and borax offer effective soap scum removal without harsh chemicals. This eco-friendly approach is gentle on surfaces while still delivering significant cleaning power. 🌿
Natural Alternative Explanation
Lemon Acid Power: Citric acid in lemon juice is a natural chelating agent, meaning it binds to minerals in hard water and makes them soluble. This breaks down the mineral component of soap scum.
Borax Cleaning Action: This natural mineral compound is an excellent water softener, preventing mineral deposits from forming while also providing gentle abrasion and whitening action.
Synergistic Effect: When lemon and borax are combined, the acid dissolves mineral deposits while the borax softens the water, preventing new deposits from forming.
Proper Application Techniques
Lemon Juice Solution: Mix fresh lemon juice with equal parts water in a spray bottle. Apply to soap-scummed surfaces and let sit for 5-10 minutes before scrubbing.
Lemon and Borax Paste: Create a thick paste by mixing lemon juice with borax powder until achieving a spreadable consistency. Apply to stubborn areas and let sit for 15 minutes before gently scrubbing.
Lemon Peel Rubbing: For light soap scum, rubbing fresh lemon peel directly onto the surface can provide immediate cleaning action.
Lemon Essential Oil Option: For those preferring ready-made solutions, lemon essential oil can be added to cleaning solutions for natural cleaning and pleasant fragrance.
Borax Scrub: Sprinkle borax onto a damp sponge and scrub soap-scummed areas. The gentle abrasiveness lifts residues without damaging surfaces.
Benefits Over Chemical Options
Eco-Friendly: Both lemon and borax are natural substances that break down safely in the environment.
No Toxic Fumes: Unlike many chemical cleaners, lemon and borax don’t produce dangerous fumes requiring extensive ventilation.
Gentle on Surfaces: Natural solutions are less likely to damage tile surfaces, grout, or natural stone.
Budget-Friendly: Lemon and borax are significantly cheaper than commercial cleaning products.
Multi-Purpose: These natural cleaners can be used throughout the home for various cleaning tasks.
Pleasant Fragrance: Lemon leaves a fresh, natural scent without artificial fragrances.
Safe Around Children: Natural ingredients are generally safer for households with children and pets.
Method 4: Steam Cleaning for Stubborn Scum
For the most stubborn soap scum, steam cleaning offers professional-grade results without chemicals. The high-temperature steam penetrates and dissolves soap scum, making it easy to wipe away. 🔥
Equipment Requirements
Steam Cleaner: Specialized steam cleaning machines heat water to produce high-temperature pressurized steam.
Handheld Steam Cleaners: Smaller, affordable units perfect for bathroom use.
Commercial Steamers: Professional-grade units providing higher temperatures and more powerful steam.
Steam Accessories: Different attachments for various surfaces:
- Triangular nozzles for grout lines
- Round brushes for tile surfaces
- Squeegee attachments for glass
- Detail nozzles for corners
Microfiber Cloths: For wiping away dissolved soap scum.
Step-by-Step Steam Process
Step 1: Prepare the Area: Remove bathroom accessories and ensure adequate ventilation.
Step 2: Fill and Heat: Fill the steam cleaner with water and allow it to reach operating temperature.
Step 3: Pre-Steam: Apply steam to the soap-scummed area in sweeping motions. Allow the steam to work for 1-2 minutes.
Step 4: Agitate: Use appropriate brush attachments to agitate the surface, breaking down softened soap scum.
Step 5: Wipe Away: Use microfiber cloths to wipe away dissolved soap scum.
Step 6: Steam Again: For stubborn areas, apply a second steam treatment.
Step 7: Final Wipe: Thoroughly wipe all surfaces to remove remaining residues.
Step 8: Dry: Use a squeegee or dry cloth to remove all moisture.
Advantages and Limitations
Advantages:
- Chemical-free cleaning
- Effective even on stubborn soap scum
- Sanitizes surfaces through high heat
- Better for the environment
- No chemical residues
- Effective on various surfaces
- Quick process for large areas
Limitations:
- Equipment costs can be high
- Requires access to electricity
- Not suitable for all surfaces
- Steam can damage unsealed natural stone
- Potential burn hazards
- May not remove deeply embedded stains
- Requires storage space for equipment
Method 5: Preventive Maintenance Solutions
Preventing soap scum buildup is significantly easier than removing established deposits. Regular maintenance ensures you won’t need to learn how to remove soap scum from bathroom tiles fast as often.
Daily Maintenance Routines
Post-Shower Squeegee: Use a squeegee on glass shower doors after each use to remove water and prevent soap scum formation.
Daily Wipe-Down: Keep a microfiber cloth in the bathroom to quickly wipe tiles and surfaces after bathing.
Ventilation: Run bathroom exhaust fans during and after showers to reduce humidity.
Thorough Rinsing: Rinse tub and shower walls thoroughly after each use to remove soap residues before they can form scum.
Towel Drying: Keep a dedicated towel in the bathroom to quickly dry surfaces and prevent water spots.
Weekly Deep Cleaning Schedule
Weekly Soap Scum Check: Examine tiles for early signs of soap scum formation and address immediately.
Light Vinegar Clean: Use diluted vinegar solution weekly to prevent mineral buildup.
Grout Brushing: Use a soft brush to clean grout lines weekly, preventing soap scum accumulation.
Glass Door Cleaning: Clean glass shower doors weekly using a vinegar solution.
Fixture Polishing: Clean and polish all bathroom fixtures to prevent soap scum deposits.
Shower Caddy Cleaning: Clean shower accessories regularly to prevent soap scum transfer.
Water Softening Solutions
Water Softener Installation: A whole-house water softener removes minerals causing soap scum formation.
Shower Filters: Point-of-use shower filters can reduce mineral content in shower water.
Descaling Additives: Add descaling products to soap and cleaning solutions for ongoing protection.
Rinse Aids: Use rinse aids in the bathroom to help water sheet off surfaces.
Professional Water Testing: Test your water to determine hardness levels and appropriate solutions.
Targeting Different Tile Types
Ceramic Tile Soap Scum Removal
Special Considerations: Ceramic tile is durable and versatile, but aggressive cleaning can remove sealants.
Best Approach: Vinegar solution with baking soda for abrasive action.
What to Avoid: Metal scrubbers that can scratch glazed surfaces.
Preventive Care: Regular sealing protects against soap scum penetration.
Natural Stone Tile Special Care
Special Considerations: Marble, granite, and travertine are porous and acid-sensitive.
Best Approach: Borax and mild soap mixtures without acidic ingredients.
What to Avoid: Acidic cleaners like vinegar, lemon juice, and harsh chemicals.
Preventive Care: Regular sealing and immediate soap scum removal.
Porcelain Tile Cleaning Methods
Special Considerations: Dense and stain-resistant but can crack if not handled properly.
Best Approach: Commercial cleaners formulated for porcelain.
What to Avoid: Extreme temperature changes and aggressive abrasion.
Preventive Care: Regular cleaning prevents soap scum penetration.
Glass Tile Maintenance
Special Considerations: Beautiful but shows spots easily and requires gentle cleaning.
Best Approach: Vinegar-based solutions with gentle scrubbing.
What to Avoid: Abrasive materials that can scratch and haze surfaces.
Preventive Care: Regular squeegeeing prevents water spots and soap scum.
Dealing with Hard Water Stains
Identifying Hard Water vs. Soap Scum
Visual Differences: Hard water stains are white, chalky deposits while soap scum appears grayish and filmy.
Texture: Hard water stains feel rough and gritty; soap scum is slippery and greasy.
Location: Hard water stains appear where water droplets dry; soap scum is more widespread.
Composition: Hard water is mineral deposits; soap scum includes soap and mineral compounds.
Testing: Applying vinegar reveals foaming with hard water minerals but not with pure soap scum.
Specialized Removal Techniques
Acid-Based Cleaners: Products containing phosphoric, citric, or hydrochloric acid dissolve mineral deposits.
Descaling Products: Designed specifically for mineral removal from bathroom surfaces.
Pumice Stone: For severely hardened deposits, careful use can remove without scratching.
Mechanical Removal: For very thick deposits, plastic scrapers can remove bulk before chemical treatment.
Repeated Applications: Stubborn deposits may require multiple treatment sessions.
Long-Term Solutions
Water Softener Installation: Addresses hard water at the source.
Reverse Osmosis: Removes minerals from water throughout the home.
Scale Inhibitors: Products that prevent mineral deposition.
Filtration Systems: Point-of-use systems for shower water.
Professional Water Treatment: Comprehensive solutions for severe hard water.
Professional Intervention
When to Call a Professional
Extensive Buildup: When soap scum has covered large areas and resists DIY methods.
Surface Damage: When tiles have been damaged by previous cleaning attempts.
Natural Stone Issues: For valuable natural stone requiring specialized care.
Time Constraints: When busy schedules prevent thorough DIY cleaning.
Health Concerns: When mold or mildew develop from soap scum.
Property Value: Before selling to ensure bathrooms appear well-maintained.
What Professionals Use
Steam Cleaning Systems: Professional-grade units providing superior results.
Industrial-Strength Cleaners: Products stronger than consumer alternatives.
Specialized Equipment: Tools designed for specific tile types.
Expert Knowledge: Understanding of cleaning chemistry and surface interaction.
Training: Professional experience in dealing with various problems.
Cost Considerations
Basic Professional Cleaning: $150-$300 for standard bathroom cleaning.
Deep Steam Cleaning: $300-$600 for thorough steam treatment.
Tile Restoration: $500-$2000 for extensive tile work.
Grout Cleaning: $200-$400 for professional grout cleaning.
Preventive Maintenance Programs: $100-$300 monthly for ongoing care.
Safety Warnings and Precautions
Chemical Safety Guidelines
Read Labels: Always read product labels before use.
Follow Instructions: Use products as directed by manufacturers.
Don’t Mix: Never combine cleaning products that shouldn’t be mixed.
Use Proper Tools: Use appropriate applicators and tools for each product.
Ventilate Properly: Ensure adequate ventilation when using chemical products.
Protect Yourself: Wear appropriate gloves, goggles, and masks.
Keep Away From Children: Store cleaning products safely out of reach.
Know Emergency Procedures: Have emergency numbers accessible.
Surface Damage Prevention
Test First: Always test products in inconspicuous areas before full application.
Avoid Abrasives: Don’t use abrasive materials on sensitive surfaces.
Rinse Thoroughly: Remove all cleaning product residues.
Follow Temperature Guidelines: Avoid temperature extremes that can damage surfaces.
Use Appropriate Tools: Choose tools suitable for your surface type.
Don’t Over-Scrub: Excessive scrubbing can damage tile and grout.
Protect Fixtures: Cover metal fixtures to prevent chemical damage.
Ventilation Requirements
Natural Ventilation: Open windows and doors when possible.
Mechanical Ventilation: Use exhaust fans and portable fans.
Chemical-Free Zones: Maintain chemical-free areas for breathing breaks.
Professional Air Quality: Consider professional assessment for severe chemical use.
Health Considerations: Leave area if feeling dizzy, lightheaded, or nauseated.
What NOT to Do When Removing Soap Scum
Common Mistakes with Terrible Consequences
Mixing Vinegar and Bleach: This creates toxic chlorine gas that can be lethal. Never combine these ingredients.
Using Abrasive Cleaners on Natural Stone: Marble, limestone, and other natural stones can be permanently damaged.
Applying Cleaners to Hot Surfaces: Chemical reactions accelerate at high temperatures, risking damage.
Using Metal Scrubbers on Tiles: Scratches trap dirt and bacteria permanently.
Neglecting Proper Ventilation: Chemical fumes can cause respiratory issues and other health problems.
Allowing Cleaners to Dry on Surfaces: Dried cleaning solutions can leave residues difficult to remove.
Using Too Much Pressure: Excessive pressure can crack tiles or dislodge grout.
Surface-Damaging Practices
Using Acidic Cleaners on Marble: Acids etch polished marble surfaces permanently.
Over-Scrubbing: Scrubbing too vigorously can remove protective glazes.
Using Steam on Unsealed Stone: Steam can penetrate and damage porous stone.
Applying Hot Water to Cold Tiles: Thermal shock can cause tile cracks.
Neglecting Protective Gear: Chemical burns and skin damage can occur without proper protection.
Improper Dilution: Using cleaners at incorrect concentrations damages surfaces.
Ignoring Sealer Reapplication: Failing to reseal surfaces after cleaning promotes future problems.
Ineffective Methods to Avoid
Using Dish Soap: Dish soap creates more soap scum rather than removing it.
Relying on Elbow Grease Alone: Chemical action is necessary for effective removal.
Ignoring Water Quality: Not addressing hard water leads to constant recurrence.
Inconsistent Cleaning: Irregular cleaning allows buildup to become established.
Using the Wrong Cleaner: Different surfaces require different cleaning approaches.
Forgetting the Squeegee: Water left on surfaces creates new soap scum.
Rinsing with Hard Water: Hard water leaves deposits that contribute to soap scum.
Pros and Cons of Different Methods
Natural Solutions vs. Chemical Cleaners
| Method | Pros | Cons | Best For |
|---|---|---|---|
| Vinegar & Baking Soda | Safe, inexpensive, eco-friendly | Requires more elbow grease, may need multiple applications | Regular maintenance, light buildup |
| Commercial Cleaners | Powerful, fast-acting | Can be expensive, chemical residue, harsh fumes | Stubborn buildup, professional-looking results |
| Steam Cleaning | Chemical-free, effective | Equipment cost, professional equipment expensive | Persistent scum, sanitizing |
| Lemon & Borax | Natural, pleasant scent | Less acidic than vinegar, may not tackle severe buildup | Preventative maintenance |
| Water Softeners | Prevents future buildup, long-term solution | Installation costs, ongoing maintenance | Hard water areas |
Cost-Benefit Analysis
Natural Solutions: Low cost ($5-20 monthly), high effort, excellent for weekly maintenance.
Commercial Cleaners: Moderate cost ($15-50 monthly), high effectiveness with moderate effort.
Steam Cleaning Equipment: High initial cost ($100-500), low ongoing cost, excellent long-term investment.
Professional Cleaning: High cost ($150-600 per session), professional results, suitable for valuable surfaces.
Water Softeners: Highest initial cost ($500-2000), long-term savings on cleaning costs.
Time Investment Considerations
Natural Solutions: 30-60 minutes weekly cleaning.
Commercial Cleaners: 15-30 minutes weekly cleaning.
Steam Cleaning: 20-40 minutes weekly cleaning with equipment.
Professional Cleaning: 1-3 hours per professional session.
Preventive Routine: 5-15 minutes daily, much less frequent deep cleaning.
Frequently Asked Questions
YES/NO Format Questions
Q1: Does vinegar effectively remove soap scum from bathroom tiles?
YES. Vinegar’s acid dissolves soap scum, but it shouldn’t be used on natural stone surfaces. White vinegar is the most effective type for this purpose.
Q2: Is baking soda safe for use on all tile types?
NO. Baking soda can be too abrasive for polished stone and some glass tiles. Always test in an inconspicuous area first.
Q3: Can soap scum cause permanent damage to bathroom tiles?
YES. If left untreated, soap scum can permanently etch and discolor tile surfaces, particularly marble, limestone, and other natural stone.
Q4: Does using hot water help remove soap scum more effectively?
YES. Warm water helps dissolve soap residues and makes cleaning solutions more effective. However, avoid extremely hot water that can damage tile seals.
Q5: Are commercial cleaners more effective than natural remedies?
YES. Commercial products often work faster and require less effort, but natural solutions can be equally effective with more elbow grease.
Q6: Can soap scum cause health problems?
YES. Soap scum creates an environment where mold and mildew thrive, potentially causing respiratory issues and allergic reactions.
Q7: Does using distilled water prevent soap scum formation?
YES. Distilled water contains no minerals, preventing the chemical reaction that creates soap scum. However, this isn’t practical for regular bathing.
Q8: Is steam cleaning safe for all tile surfaces?
NO. Steam can damage unsealed natural stone, delicate glass, and tiles with loose adhesion. Always check manufacturer recommendations.
Q9: Can soap scum be prevented entirely?
NO. While preventive measures significantly reduce soap scum, completely preventing it is nearly impossible with regular bathing.
Q10: Does all soap create soap scum?
NO. Synthetic detergents, body washes, and some liquid soaps create significantly less soap scum than traditional bar soaps.
Final Checklist for Effective Soap Scum Removal
Pre-Cleaning Checklist
- □ Assess the severity of soap scum buildup
- □ Identify tile type for appropriate cleaning method
- □ Gather necessary supplies and protective equipment
- □ Ensure proper ventilation in the bathroom
- □ Remove bathroom accessories and personal items
- □ Protect metal fixtures and surrounding areas
- □ Read product labels thoroughly
- □ Test cleaners in inconspicuous area first
- □ Wear protective gloves and eyewear
- □ Prepare cleaning solutions properly
During Cleaning Checklist
- □ Apply cleaner according to instructions
- □ Allow proper dwell time for chemical action
- □ Use appropriate agitation for your tile type
- □ Start from top to bottom to catch drips
- □ Pay special attention to corners and grout lines
- □ Rinse thoroughly with clean water
- □ Check for remaining soap scum
- □ Reapply as needed for stubborn areas
- □ Maintain good ventilation throughout
- □ Wipe fixtures with appropriate materials
Post-Cleaning Checklist
- □ Rinse all surfaces thoroughly
- □ Remove all cleaning solution residues
- □ Dry surfaces with microfiber cloths
- □ Squeegee glass shower doors
- □ Clean up any drips or splashes
- □ Properly store cleaning supplies
- □ Inspect for any missed spots
- □ Apply sealant if necessary
- □ Document cleaning date for scheduling
- □ Plan preventive maintenance routine
Trusted References and Sources
Scientific Studies
- Water Quality Association: Research on hard water mineral composition and soap scum formation.
- Journal of Surfactants and Detergents: Studies on soap scum chemistry and removal methods.
- Environmental Protection Agency: Guidelines on safe cleaning chemical use.
- American Chemical Society: Research on cleaning chemistry and safer alternatives.
Industry Expert Opinions
- Cleaning Institute Guidelines: Professional standards for tile and bathroom cleaning.
- International Sanitary Supply Association: Professional cleaning industry resources.
- Tile Council of North America: Expert guidance on tile maintenance and cleaning.
- National Association of Home Builders: Best practices for bathroom maintenance.
Product Recommendations
- Consumer Reports: Testing and recommendations for bathroom cleaning products.
- Good Housekeeping Institute: Product testing and recommendations.
- EPA Safer Choice Program: Certified environmentally friendly cleaning products.
- Toxic-Free Cleaning Resources: Safe product alternatives.
Final Thoughts
Long-Term Bathroom Health
Understanding how to remove soap scum from bathroom tiles fast is essential for maintaining a healthy, beautiful bathroom environment. By implementing proper cleaning techniques and preventive measures, you can keep your bathroom sparkling clean while protecting your investment in tile surfaces. 🏠✨
Remember that soap scum removal isn’t just about aesthetics—it’s about creating a healthy living environment for you and your family. Regular maintenance prevents the buildup that leads to mold growth, bacteria proliferation, and surface damage.
Investment in Quality Tools
Consider the investment in quality cleaning tools and products as an investment in your home’s longevity. Quality microfiber cloths, appropriate brushes, and effective cleaning solutions will serve you well for years, making regular cleaning easier and more effective.
Professional Advice Summary
- Start with prevention: Daily squeegeeing and weekly light cleaning prevent heavy buildup.
- Choose appropriate methods: Natural remedies work for regular maintenance; commercial products for stubborn buildup.
- Protect your surfaces: Use the right tools and methods for your specific tile type.
- Address hard water: Consider water softening solutions for long-term relief from soap scum.
- Don’t procrastinate: Address soap scum as soon as it appears—it only gets harder to remove.
Premium Tips from Niaz Khan Expert
After 25+ years of experience in professional cleaning and home maintenance, I’ve developed proven strategies for tackling soap scum effectively. Here are my premium tips:
Tip 1 – The Three-Step Success System: For best results, follow a systematic process: dissolve (apply cleaner), agitate (scrub gently), and remove (rinse thoroughly). This three-step approach ensures complete soap scum removal without damaging surfaces.
Tip 2 – Temperature Matters: Warm water enhances cleaning effectiveness. I recommend using warm (not hot) water with your cleaning solutions for optimal results. Hot water can damage some tile surfaces and sealants.
Tip 3 – Timing Is Everything: The longer you allow cleaning solutions to work, the more effective they become. However, don’t exceed manufacturer recommendations for dwell time. Generally, 5-15 minutes is optimal for most cleaners.
Tip 4 – Prevention Is Your Best Investment: Daily maintenance of 2-3 minutes with a squeegee can save hours of deep cleaning. This simple habit has saved my clients thousands in professional cleaning costs over the years.
Tip 5 – The Professional’s Secret: Professional cleaners often combine a general-purpose cleaner with specific solutions for different surface types. For a truly professional finish, consider creating a cleaning kit with specialized products for tiles, glass, and fixtures.
Tip 6 – Grout Deserves Special Attention: Grout is particularly vulnerable to soap scum and requires specialized care. Use a stiff-bristled brush designed for grout and consider applying grout sealer after thorough cleaning to prevent future staining.
Tip 7 – Know Your Water: Understanding your water hardness level can help you choose the most effective products. Hard water requires more aggressive mineral-dissolving products.
Tip 8 – The 24-Hour Rule: For extremely stubborn soap scum, apply a heavy coating of cleaning solution, cover with plastic wrap, and let it work overnight. This extended dwell time can break down even the toughest buildup.
Disclaimer
The information provided in this article is for general informational purposes only and does not constitute professional cleaning or home maintenance advice. Always test cleaning products in inconspicuous areas before applying to visible surfaces. Individual results may vary based on the condition of surfaces, type of tile, and severity of soap scum buildup. While every effort has been made to ensure accuracy, the author and publisher assume no responsibility for any damage or loss resulting from the use of information contained herein. For professional cleaning services or specific concerns, consult a qualified professional. Always follow manufacturer guidelines and instructions for cleaning products, and ensure proper ventilation when using cleaning chemicals.
Written By Niaz Khan

Niaz Khan is an SEO blogger, digital marketer, and content writer with 5+ years of experience in search engine optimization, content strategy, and online growth.
Focused on people-first content and Google-compliant SEO practices.